
Introduction to Pear Apple Grilled Cheese
The Comfort of Grilled Cheese with a Twist
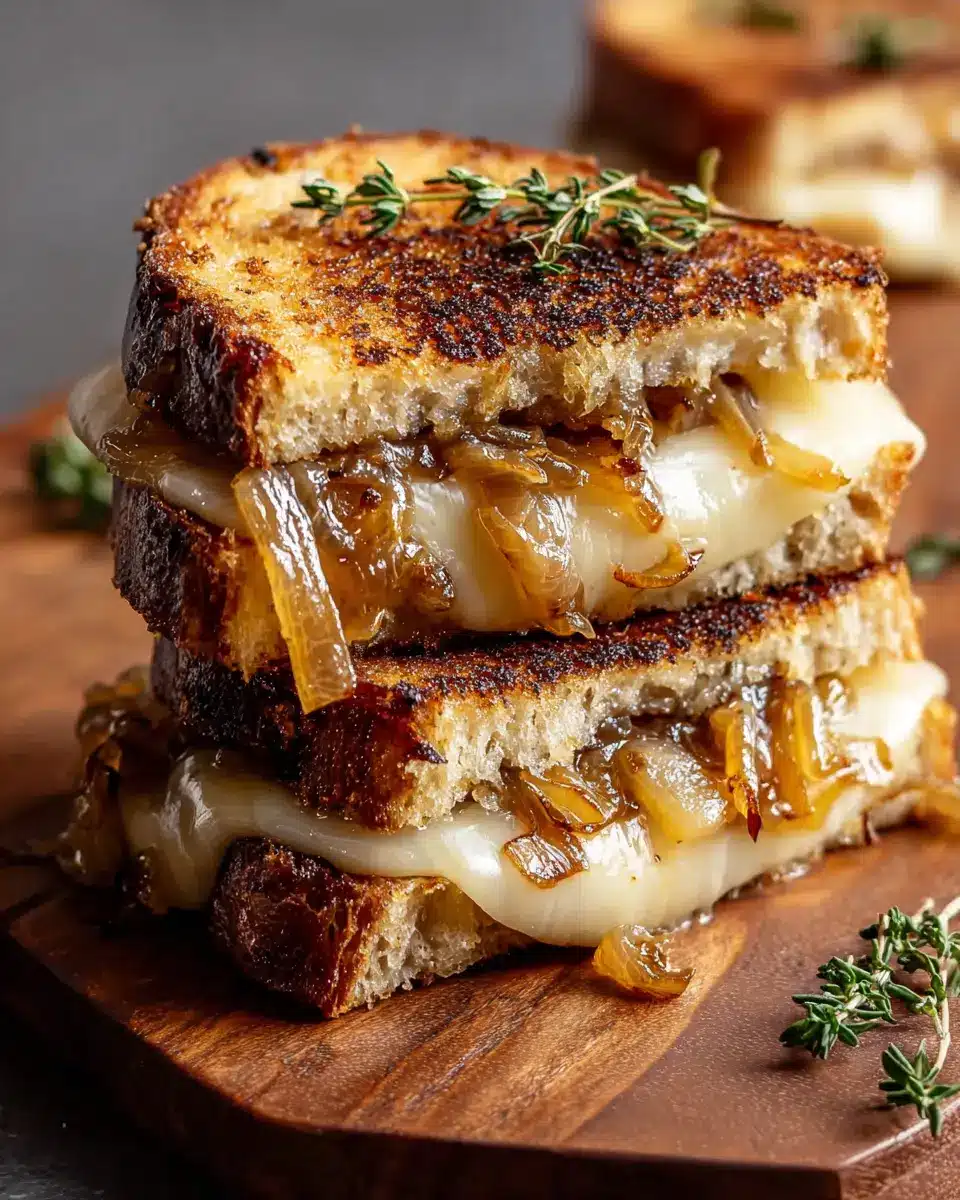
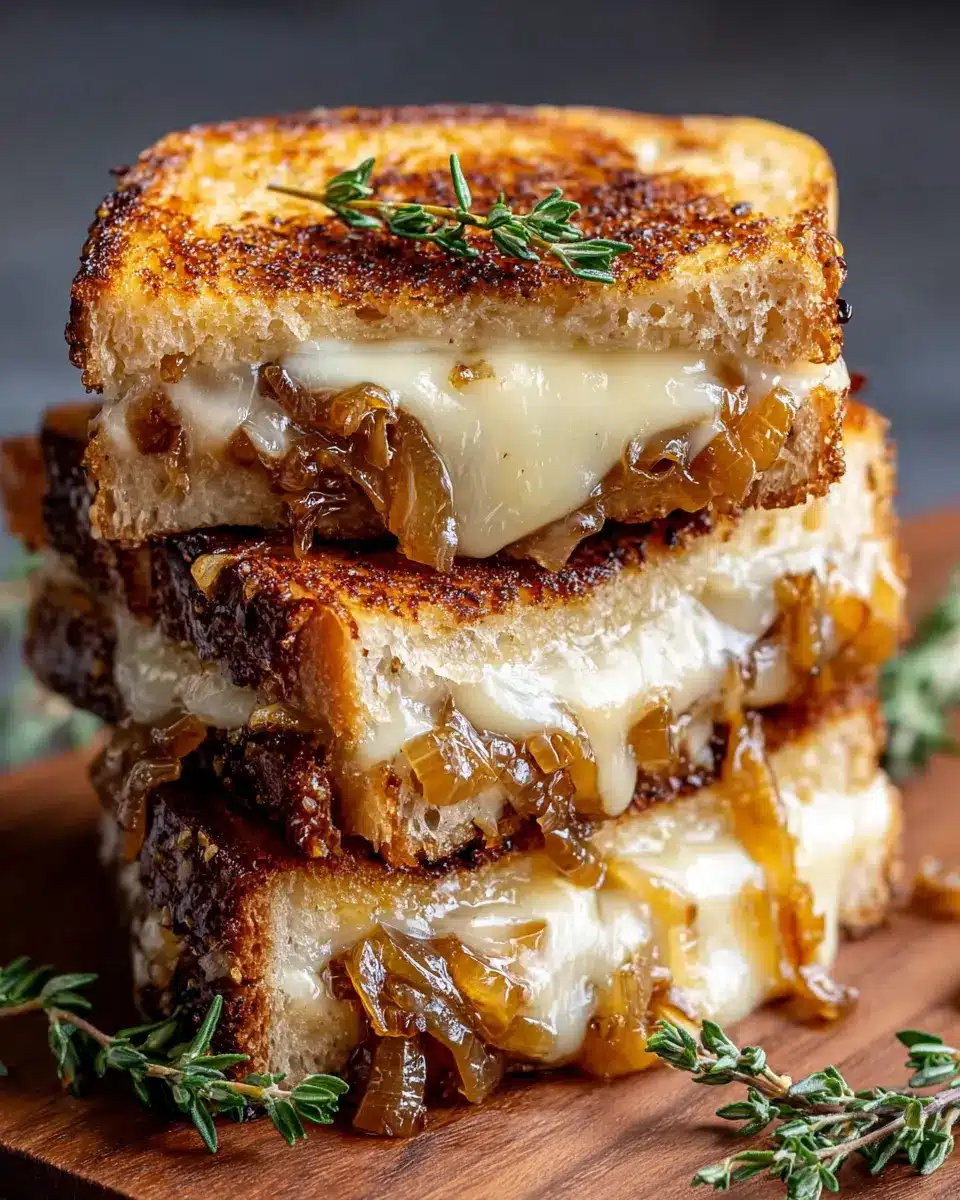
There’s something incredibly comforting about a warm, gooey grilled cheese sandwich, isn’t there? But let’s be honest, it can also feel a bit predictable. That’s where the pear apple grilled cheese comes in, transforming the classic into something extraordinary. This delightful recipe elevates your traditional grilled cheese with sweet slices of pear and apple, complemented by rich, caramelized onions and sharp cheddar cheese.
Imagine biting into a sandwich where the crispy, golden bread gives way to a deliciously melty interior while the flavors dance together in perfect harmony. Not only does this sandwich satisfy those cheesy cravings, but it also brings a light, fruity note that makes it feel gourmet without the fuss.
Ready to impress at your next brunch or cozy weeknight dinner? Pairing the sweetness of fruit with the savory depth of caramelized onions creates a culinary experience that is both comforting and chic. Whether you’re a busy professional looking to spice up your lunch or a foodie eager to try something new, this pear apple grilled cheese is a match made in heaven. So grab your skillet, and let’s get cooking!
Ingredients for Pear Apple Grilled Cheese
Essential ingredients for a gourmet sandwich
Creating the perfect pear apple grilled cheese is all about selecting high-quality ingredients that elevate this classic comfort food. Here’s a breakdown of what you’ll need:
-
Bread: Start with 4 slices of sourdough bread. Its crusty exterior and tangy flavor beautifully complement the sweetness of the fruit.
-
Butter: You’ll need 2 tablespoons of unsalted butter for that irresistible, golden crust.
-
Fruits: Choose 1 medium pear and 1 medium apple, both sliced thin for easy layering and a delightful texture contrast.
-
Onion: A medium onion, sliced thinly, is essential for caramelization that adds rich depth to the sandwich.
-
Cheese: Use 1 cup of shredded sharp cheddar cheese. Its bold flavor balances the sweetness of the fruits perfectly.
-
Flavor Additions: A splash of balsamic vinegar, plus salt and black pepper to taste, rounds out the flavors.
These ingredients work harmoniously together, making your pear apple grilled cheese not just a dish, but an experience! For some tips on ingredient sourcing, you might want to check out this guide on choosing fresh produce. Enjoy diving into the deliciousness!
Preparing Pear Apple Grilled Cheese
Creating a culinary experience that marries the sweet and savory elements of fruit with the warmth of melted cheese is a delight. Our pear apple grilled cheese with caramelized onions offers an unforgettable balance of flavors. Follow these step-by-step instructions to elevate this comforting classic!
Caramelize the Onions for Depth of Flavor
First, let’s talk about the hero of this recipe: the caramelized onions. Start by melting 1 tablespoon of unsalted butter in a medium skillet over medium heat. Add in your thinly sliced onion along with a pinch of salt to help draw out their natural sweetness. Stir the onions occasionally for about 10 minutes until they’ve reached that perfect golden brown color and become soft. For that extra layer of flavor, stir in 1 tablespoon of balsamic vinegar and let it simmer for an additional 2-3 minutes. This not only enhances the sweetness but also adds a hint of tang. Once done, set those delightful onions aside; they're going to make your sandwich sing.
Prepare the Skillet for Grilling
In the same skillet, it's time to prepare for grilling your pear apple grilled cheese sandwiches. Melt the remaining 1 tablespoon of unsalted butter over medium heat. This will give your bread that beautiful, golden crunch when grilling. Ensure your skillet is evenly coated with butter for a perfect sear.
Assemble the Sandwich with Precision
Now for the fun part—assembling your sandwiches! On two slices of sourdough bread, layer half of your shredded sharp cheddar cheese. Spread a generous amount of the caramelized onions evenly across the cheese, and then add thinly sliced apples and pears. Follow that with the remaining cheddar cheese, concluding with the other two slices of bread on top. This layering not only looks appetizing but also ensures that each bite is packed with flavor.
Grill to Golden Perfection on Both Sides
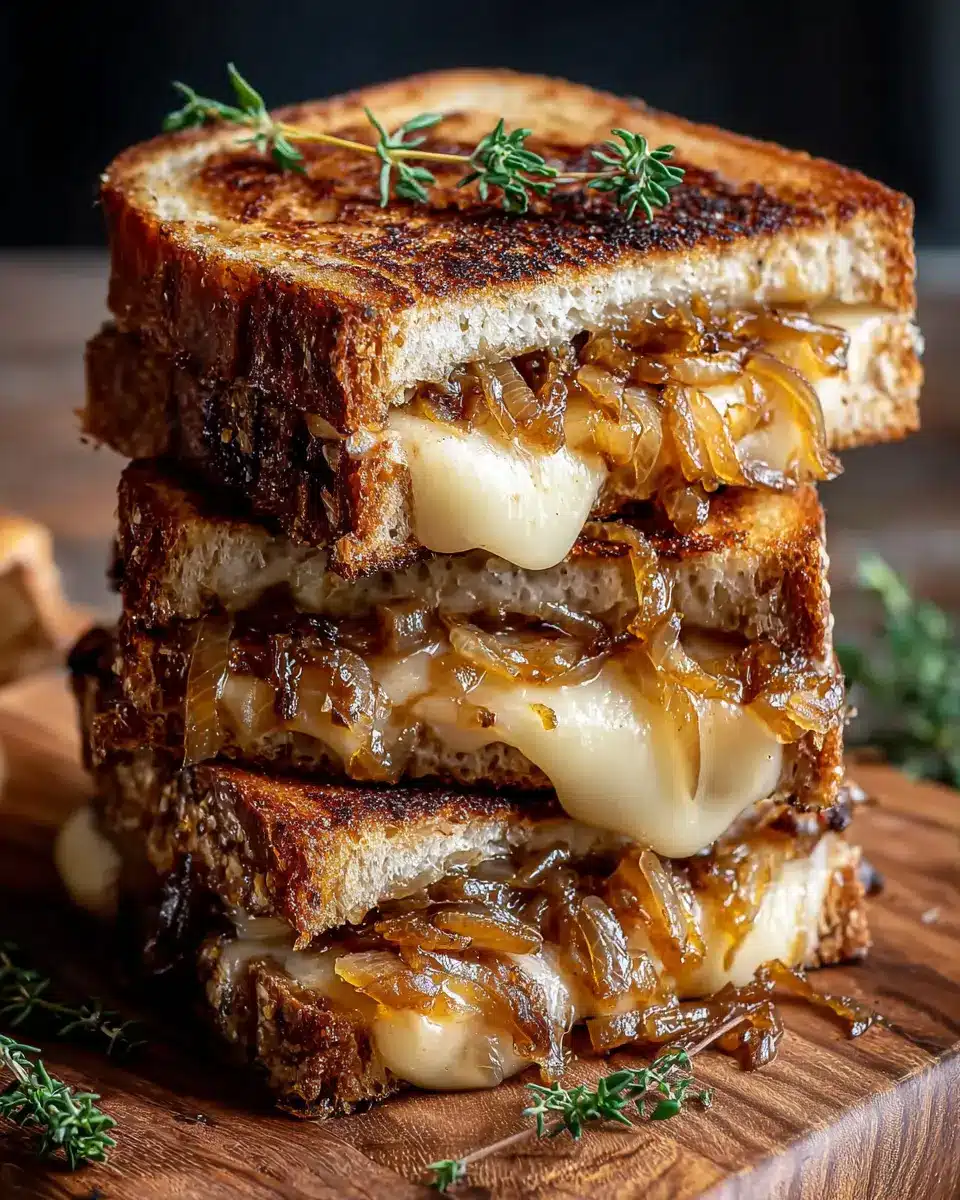
Place one of your assembled sandwiches in the heated skillet. Let it cook undisturbed for 4-5 minutes until one side is golden brown and crisp. Carefully flip it using a spatula and grill the other side for another 4-5 minutes. Keep an eye on it; you want that cheese to melt beautifully while the bread gets a satisfying crunch.
Slice, Serve, and Savor
Once both sides are toasted to perfection, remove the sandwiches from the skillet. Allow them to cool for about a minute (if you can resist that warm, gooey goodness). Slice them in half and serve immediately. Pairing this delightful creation with a crisp side salad or a warm soup would create a perfect dining experience.
Enjoy your pear apple grilled cheese as a gourmet treat that balances sweetness, savory richness, and cheesy goodness. Ready to take your grilled cheese game to the next level?
Variations on Pear Apple Grilled Cheese
Add Turkey Bacon for Extra Richness
For those days when you crave a little extra indulgence, consider adding turkey bacon to your pear apple grilled cheese. The salty, smoky flavor of turkey bacon wonderfully complements the sweetness of the fruit, making each bite even more satisfying. It's an easy way to take this gourmet sandwich to new heights, appealing to both meat lovers and fans of vegetarian meals alike.
Swap Out Cheddar for Gouda or Brie
If you’re in the mood for a different flavor profile, try swapping sharp cheddar for gouda or brie. Gouda’s creamy texture provides a unique twist, while brie adds a luxurious richness that pairs flawlessly with the caramelized onions. Whichever cheese you choose, these variations keep the essence of the pear apple grilled cheese alive, offering a delightful taste experience every time.
Looking for more ways to customize? Check out this guide for additional grilled cheese inspiration!
Cooking Tips for Pear Apple Grilled Cheese
The Best Bread for Grilling
Choosing the right bread is crucial for your pear apple grilled cheese. Sourdough is a top choice; its tangy flavor complements the sweetness of the fruit beautifully. However, you can also experiment with a hearty ciabatta or multigrain bread for added texture. Just ensure it's sturdy enough to hold up against the melted cheese and juicy slices of pear and apple.
How to Achieve the Perfect Cheese Melt
For that delicious gooeyness, the key is patience! Use shredded sharp cheddar; it melts evenly and provides a robust flavor. Grill over medium heat, allowing the cheese to melt slowly without burning the bread. If you prefer an even cheesier experience, consider mixing in some Gruyère or mozzarella. Don’t rush it—give those sandwiches 4-5 minutes per side for golden perfection.
For more tips on bread types, check out King Arthur Baking for an in-depth guide!
Serving Suggestions for Pear Apple Grilled Cheese
Pairing with Sides That Complement the Flavors
To elevate your pear apple grilled cheese, consider serving it with sides that highlight its unique sweet-and-savory profile. A simple arugula salad drizzled with lemon vinaigrette adds a refreshing contrast, while a warm bowl of tomato soup introduces a comforting creaminess that complements the sandwich’s rich textures.
Also, try pairing with sweet potato fries for a delightful crunch or crispy roasted Brussels sprouts for a savory flair. If you're feeling adventurous, add a touch of cranberry sauce on the side to enhance those fruity flavors. Each option brings a delightful dimension to your meal and makes it feel gourmet! Explore more side ideas here.
Time Breakdown for Pear Apple Grilled Cheese
Preparation Time
Get your delicious pear apple grilled cheese started with a quick preparation time of just 10 minutes. This is all about slicing your fruits and getting your ingredients ready.
Cooking Time
Once you're prepped, the cooking process will take you about 25 minutes. This includes caramelizing the onions and grilling the sandwiches to a perfect golden brown.
Total Time
In just 35 minutes, you’ll have two gourmet pear apple grilled cheese sandwiches ready to impress your taste buds and those of your friends or family. Perfect for a cozy night in!
Ready to make this delightful dish? Head over to the full recipe for step-by-step instructions!
Nutritional Facts for Pear Apple Grilled Cheese
When indulging in this delicious Pear & Apple Grilled Cheese With Caramelized Onions, it’s essential to know its nutritional profile for a balanced meal.
Calories per Serving
Each serving contains approximately 410 calories. This makes it a satisfying choice without being overly indulgent.
Breakdown of Macronutrients
The macronutrient composition includes:
- Carbohydrates: 42g
- Protein: 15g
- Fat: 20g (including 11g saturated fat)
With a moderate amount of sugars (8g) and fiber (4g), this sandwich can serve as a tasty yet nourishing meal option. For more health tips and meal inspirations, check out Healthline and Mayo Clinic.
FAQs about Pear Apple Grilled Cheese
Can I use different cheese varieties?
Absolutely! While this pear apple grilled cheese shines with sharp cheddar, feel free to experiment with other cheeses. Brie offers a creamy, decadent twist, while gouda gives a sweet, smoky flavor. For a bit of tang, try goat cheese! Just remember that each cheese brings its own unique taste profile, so have fun mixing and matching.
What are some side dishes that go well with grilled cheese?
Pair your pear apple grilled cheese with fresh sides for a complete meal. A simple mixed greens salad dressed with a light vinaigrette complements the richness of the sandwich beautifully. Tomato soup is a classic choice; the acidity balances the cheesy goodness. Not feeling soup? A side of roasted vegetables or sweet potato fries can add a crunchy contrast.
How do I store leftovers?
If you have any leftovers of your pear apple grilled cheese, store them in an airtight container in the fridge for up to three days. To reheat, simply use a skillet over low heat to restore that delightful crispiness. Microwaving may result in a soggy sandwich, so avoid that if you can!
Conclusion on Pear Apple Grilled Cheese
Creating a pear apple grilled cheese sandwich is an exciting culinary adventure that brings together unique flavors in a comforting dish. With sweet, juicy fruits, hearty cheese, and rich caramelized onions, this recipe is perfect for gourmet meals at home. Give it a try; your taste buds will thank you!

Pear & Apple Grilled Cheese With Caramelized Onions Recipe
Equipment
- skillet
Ingredients
Bread & Butter
- 4 slices sourdough bread
- 2 tablespoons unsalted butter
Fruit & Vegetables
- 1 medium pear, thinly sliced
- 1 medium apple, thinly sliced
- 1 medium onion, thinly sliced
Dairy
- 1 cup shredded sharp cheddar cheese
Additional Flavorings
- 1 tablespoon balsamic vinegar
- Salt to taste
- Black pepper to taste
Instructions
Cooking Instructions
- Melt 1 tablespoon of unsalted butter in a skillet over medium heat. Add the thinly sliced onion and a pinch of salt. Cook, stirring occasionally, for about 10 minutes until the onions become golden brown and soft. Stir in the balsamic vinegar and cook for another 2-3 minutes to deepen the flavor. Remove the caramelized onions from the skillet and set aside.
- In the same skillet, melt the remaining tablespoon of butter over medium heat, ready for grilling the sandwiches.
- On two slices of sourdough bread, layer half of the shredded cheddar cheese, spread the caramelized onions evenly over the cheese, add the apple slices, then the pear slices, and top with the remaining cheddar cheese. Finish by placing the other two slices of bread on top.
- Place one sandwich in the heated skillet. Cook for 4-5 minutes on one side or until the bread is golden brown and crispy.
- Carefully flip the sandwich using a spatula and continue to grill for another 4-5 minutes until the second side is golden and the cheese inside is fully melted.
- Grill the second sandwich following the same method.
- Remove both sandwiches from the skillet, let them cool for a minute, slice in half, and serve warm for maximum flavor and gooey texture.

Leave a Reply