
Introduction to Key Lime Pie Bars
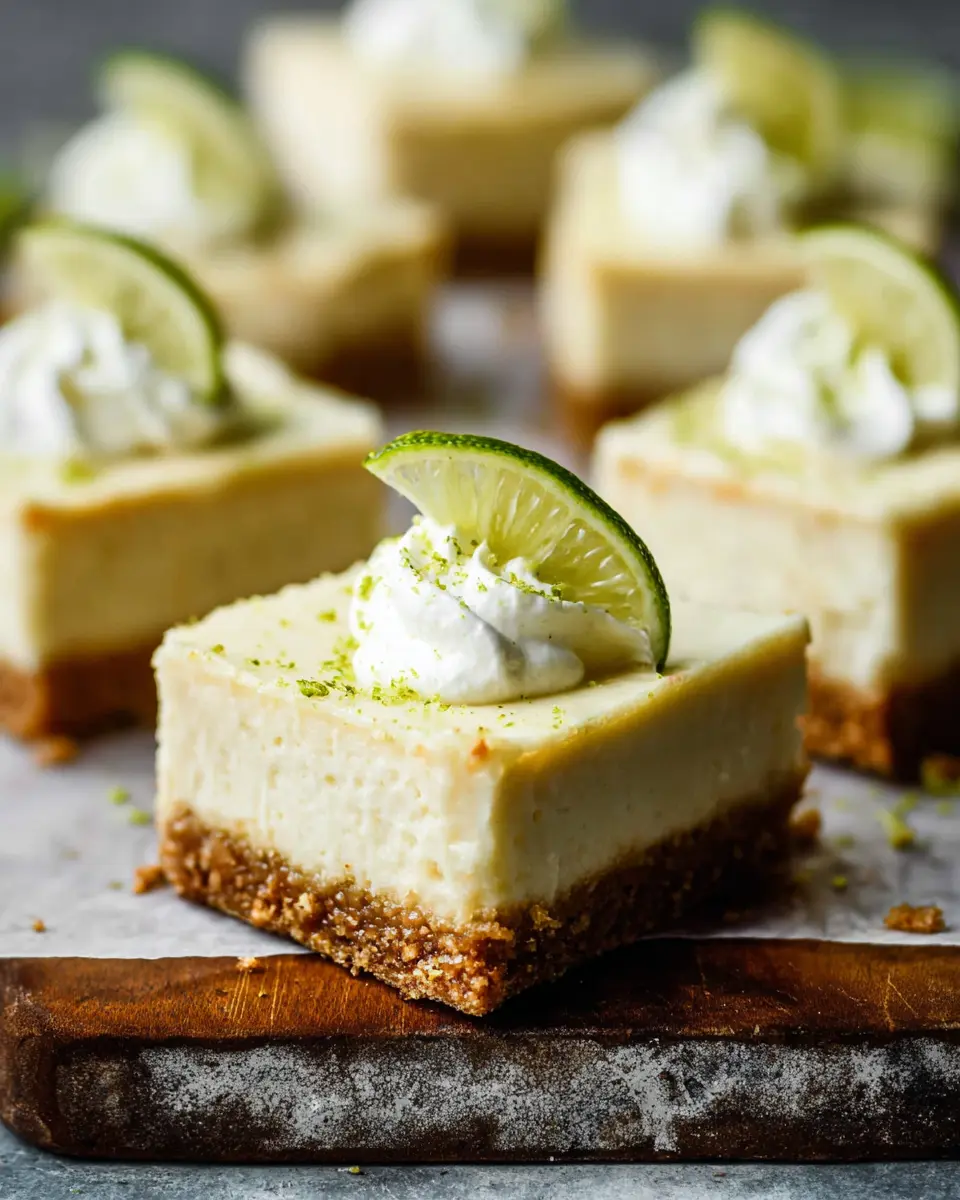
Key Lime Pie Bars are more than just a sweet treat; they are a delightful slice of tropical sunshine! What sets these bars apart is their perfect combination of a buttery graham cracker crust, a creamy, tart key lime filling, and a light, airy topping of whipped cream. This dessert captures the essence of classic key lime pie without the fuss of a full pie, making it incredibly appealing for those who crave convenience and flavor.
So, why are these Key Lime Pie Bars a favorite among dessert lovers? For one, they’re the ideal balance of sweetness and tanginess, making them refreshing, especially during warm months. Plus, their easy-to-follow recipe allows you to whip them up for any occasion, from casual family dinners to elegant parties or potlucks. They’re not just a dessert; they spark conversations!
Did you know that key limes are smaller and have a unique flavor profile compared to regular limes? Their brightness adds a special zing that’s hard to resist. So grab your ingredients, and get ready to impress your friends and family with these delicious bars! For more on the history of key lime pie, check out sources like Smithsonian Magazine or The New York Times Cooking.
Ingredients for Key Lime Pie Bars
Essential Ingredients for the Crust
To kick off your Key Lime Pie Bars, you need the perfect crust that complements the zesty filling. Gather these essential ingredients:
- Graham Cracker Crumbs: Use about 1 ½ cups, which is approximately 12 full sheets crushed into a fine texture. This provides the base for that buttery flavor.
- Granulated Sugar: Just ⅓ cup helps to enhance the sweetness of the crust, balancing the tangy filling.
- Butter: You'll need 6 tablespoons of melted butter, which binds the crumbs and adds richness to the crust.
If you want to learn more about creating the perfect graham cracker crust, you might enjoy this article on The Science of Baking.
Key Ingredients for the Filling
The filling of your Key Lime Pie Bars is where the real magic happens. Here’s what you need:
- Sweetened Condensed Milk: Two 14-ounce cans will give the filling that creamy texture that we all crave.
- Cream Cheese: Four ounces (softened) help create a smooth and decadent layer.
- Key Lime Juice: For the authentic flavor, use ¾ cup of fresh key lime juice, or bottled options like Nellie and Joe's work perfectly in a pinch.
- Lime Zest: The zest of 2 regular limes or 4 key limes brightens the filling with an extra punch of flavor.
These simple yet delicious ingredients will make your Key Lime Pie Bars a hit at any gathering!
Preparing Key Lime Pie Bars
Making Key Lime Pie Bars is a delightful and straightforward process that results in a refreshing dessert everyone will love. Let's dive into how to prepare these delectable treats step by step!
Gather and Prepare All Ingredients
Begin your culinary journey by collecting all the necessary ingredients. For the crust, you'll need graham cracker crumbs, granulated sugar, and butter. The creamy filling requires sweetened condensed milk, cream cheese, key lime juice, and some lime zest for that zesty kick. You might even want to grab a zester for the lime. Don't forget to preheat your oven to 350°F (175°C) to ensure it's ready when you need it!
Make the Graham Cracker Crust
For the perfect base of your Key Lime Pie Bars, it’s all about the crust. In a mixing bowl, combine 1.5 cups of graham cracker crumbs with ⅓ cup of granulated sugar. Next, drizzle in 6 tablespoons of melted butter and mix until the crumbs are evenly coated. Press this mixture firmly into an 8x8-inch baking pan to form an even layer. Bake for about 10 minutes, allowing the crust to set and develop a golden color. Once done, let it cool completely before moving on to the filling!
Mix the Creamy Key Lime Filling
While your crust cools, this is a great time to make the filling. In a separate bowl, beat 4 ounces of softened cream cheese until smooth. Gradually add in two cans of sweetened condensed milk, mixing until well combined. Now, the fun part—pour in ¾ cup of key lime juice and the zest of two limes. This combo adds that lovely tart flavor we're after. Blend everything together until the mixture is completely smooth and creamy.
Bake the Prepared Bars
Pour the luscious key lime filling over your cooled graham cracker crust, spreading it evenly. Return your baking dish to the oven and bake for another 10 minutes. The filling should just set—be careful not to overbake! After serving, allow them to cool at room temperature for about 30 minutes before refrigerating. Chilling is crucial; let them rest in the fridge for at least three hours to fully set.
Chill and Serve with Whipped Cream
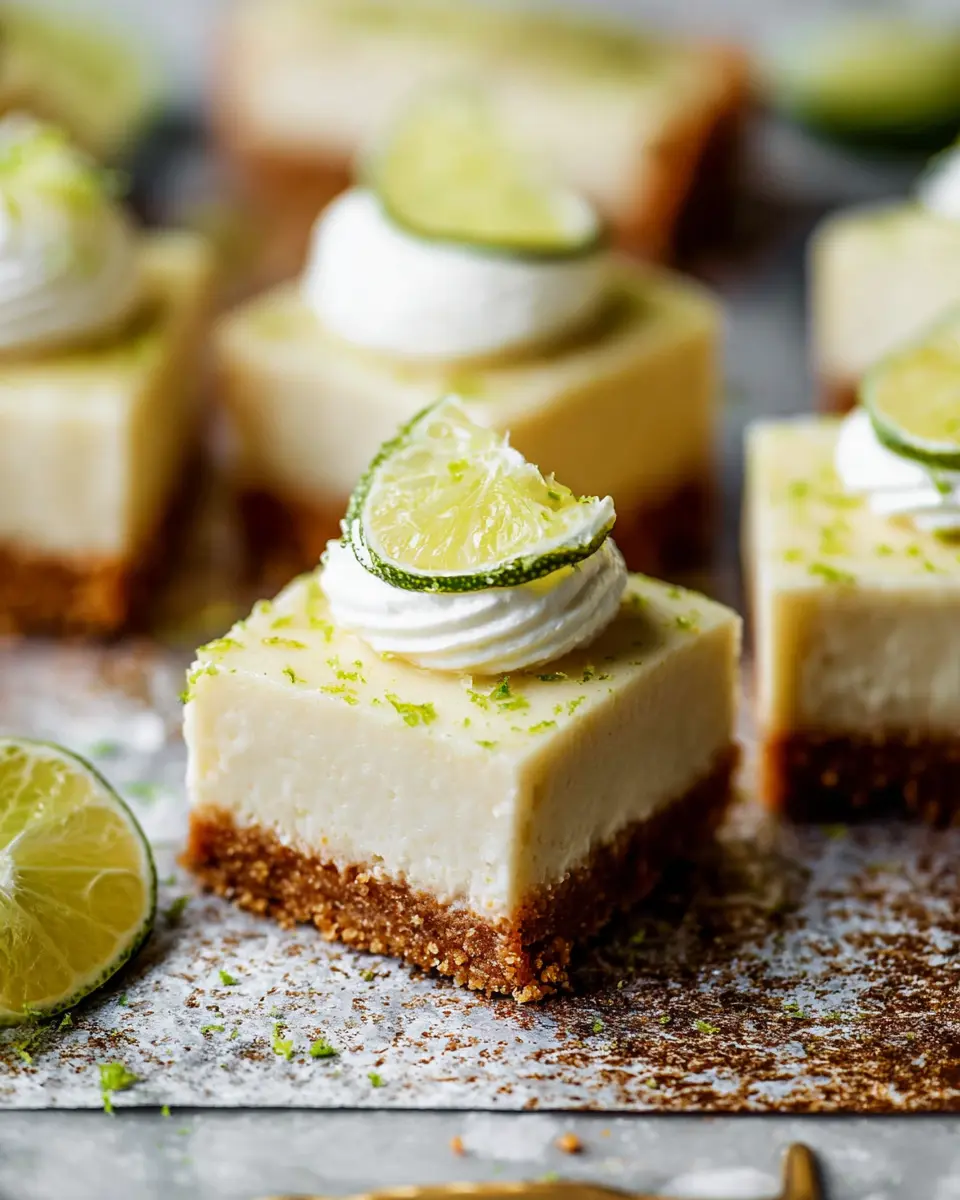
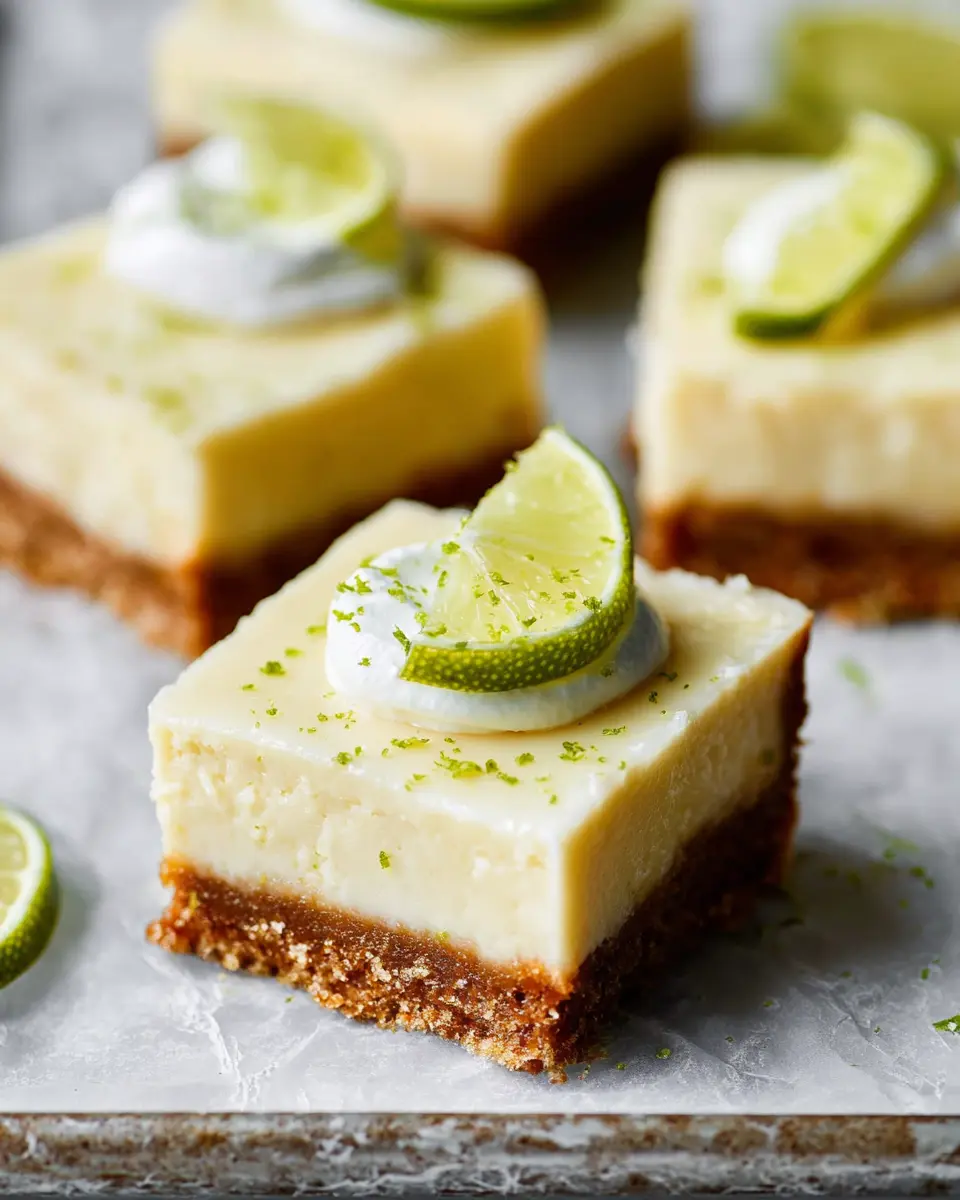
When you’re ready to serve your Key Lime Pie Bars, the final touch is a dollop of fresh whipped cream on top—optional, but oh so yummy! Slice into squares, plate them up, and watch these sweet treats disappear in no time. If you want to get creative, consider garnishing with extra lime zest or slices for a vibrant presentation.
By following these simple steps, you’ll create delightful Key Lime Pie Bars that are perfect for potlucks or a sweet weekend treat. Enjoy!
Variations on Key Lime Pie Bars
Key Lime Bars with Coconut
For a tropical twist, consider adding shredded coconut to your Key Lime Pie Bars. Simply mix in about ½ cup of unsweetened coconut flakes into your graham cracker crust before pressing it into your baking dish. This not only enhances the flavor but also brings a delightful texture. You can even garnish your bars with a sprinkle of toasted coconut for a beautiful presentation.
Gluten-Free Key Lime Bars
Craving gluten-free options? Swap traditional graham cracker crumbs for gluten-free alternatives like almond or coconut flour. Combine it with melted coconut oil and a touch of honey to create a delicious crust. This variation maintains the essence of your beloved Key Lime Pie Bars while accommodating dietary needs.
For more creative desserts, check out other delicious variations of classic recipes on sites like Food52 and Smitten Kitchen. Every twist opens a new door to mouthwatering possibilities!
Cooking Notes for Key Lime Pie Bars
Pro Tips for Achieving the Perfect Crust
To create a buttery graham cracker crust that holds up well, ensure your butter is fully melted and evenly mixed into the crumbs. Press the mixture firmly into your baking pan for a solid base, and don’t forget to bake it just until it turns golden—overbaking can lead to a dry texture. For an added flavor boost, consider mixing in a pinch of salt or some finely shredded coconut!
Recommended Tools for Easier Preparation
Investing in a few useful tools can make your Key Lime Pie Bars experience even smoother. A good-quality zester can help you extract that fresh lime zest effectively, adding vibrant flavor. Additionally, a cut and serve turner will ensure easy slicing when you’re ready to serve. Lastly, an 8x8 dish is perfectly sized for this recipe, making cleanup a breeze. Happy baking!
For more tips on zesting or pie-making, check out this handy guide on zesting techniques!
Serving Suggestions for Key Lime Pie Bars
Perfect Occasions for Enjoying Key Lime Pie Bars
Key Lime Pie Bars are a delightful treat that shine at various gatherings. Whether it's a summer barbecue, a birthday celebration, or a cozy family dinner, these bars will impress your guests with their zesty sweetness. They also make a refreshing dessert for holidays like Independence Day or Memorial Day, offering a slice of sunshine that's hard to resist!
Beverage Pairings That Complement
To enhance your experience with your Key Lime Pie Bars, consider serving them with some chilled beverages. Light and refreshing options such as sparkling water infused with citrus or a fruity iced tea work wonderfully. For those looking for something a bit zestier, a homemade lemonade can elevate the flavors of the lime. You could even enjoy these bars alongside a fresh fruit smoothie, creating a delightful harmony of tastes.
For more entertaining ideas, check out Food Network's Summer Party Guide.
Time breakdown for Key Lime Pie Bars
Preparation time
You’ll want to set aside about 1 hour and 15 minutes for preparation. This includes making the graham cracker crust, mixing the zesty key lime filling, and allowing everything to cool properly before baking.
Baking time
The baking time is quite straightforward: only 15 minutes in the oven will have your Key Lime Pie Bars perfectly set and ready for the fridge.
Total time
In total, you'll need around 1 hour and 30 minutes from start to finish, not including the chill time for those bars. Just imagine impressing your friends at your next gathering with these tangy delights! Don’t forget to check out more tips on timing and preparation to ensure your bars turn out perfect every time.
For a deeper dive into the wonders of baking, you can also explore The Spruce Eats or Serious Eats for more information. Happy baking!
Nutritional facts for Key Lime Pie Bars
Calories per serving
Each serving of these delectable Key Lime Pie Bars packs in 153 calories. That’s a sweet treat you can indulge in without breaking the calorie bank!
Fat content
These bars contain 10g of fat per serving, with about 6g as saturated fat. While they’re rich and creamy, enjoying them in moderation is a great way to satisfy your sweet tooth responsibly.
Sugar content
Holding some sweetness, the bars feature 9g of sugar per serving. This balance of tart and sweet flavors is what makes Key Lime Pie Bars incredibly irresistible and a delightful dessert choice for any occasion!
For detailed nutritional analysis, head over to Healthline's nutrition section.
FAQs about Key Lime Pie Bars
Can I use regular lime juice instead of key lime juice?
Absolutely! While key lime juice gives these bars their signature tangy flavor, you can substitute it with regular lime juice if that's what you have on hand. Just be mindful that the taste will be slightly different, as key limes are typically sweeter and less acidic than their regular counterparts.
How should I store leftover key lime pie bars?
To keep your key lime pie bars fresh, store them in an airtight container in the refrigerator. They can last up to a week if properly stored. If you notice any condensation, just wipe the cover before sealing to avoid sogginess.
Can I freeze key lime pie bars?
Yes, you can freeze your key lime pie bars! To do this, tightly cover the pan with plastic wrap and aluminum foil, and they can last in the freezer for up to three months. When you're ready to enjoy them, simply thaw overnight in the fridge before serving for the best texture.
For more tips on storing desserts, check out this article on food preservation for professional insights.
Conclusion on Key Lime Pie Bars
In summary, Key Lime Pie Bars are a delightful treat that combines a crispy graham cracker crust with a smooth, tangy filling. Easy to prepare, these bars are perfect for any occasion. Don't forget to top them with fresh whipped cream for that ideal finishing touch. Enjoy your baking!

Key Lime Pie Bars
Equipment
- cut and serve turner
- 8x8 dish
- Zester
Ingredients
Graham Cracker Crust
- 1.5 cups graham cracker crumbs about 12 full sheets, crushed
- ⅓ cup granulated sugar
- 6 Tablespoons butter melted
Key Lime Filling
- 2 14 ounce cans sweetened condensed milk
- 4 ounces cream cheese softened
- ¾ cup key lime juice *
- 2 zest of regular limes or 4 key limes
- fresh whipped cream for topping, optional
Instructions
Preparation
- Make Crust: For the crust, combine the graham cracker crumbs, sugar, and butter and press into an 8'' square baking pan.
- Bake at 350 degrees F for 10 minutes. Allow to cool before adding filling.
- Filling: Add cream cheese to a mixing bowl then beat well with electric beaters until smooth. Add both cans of sweetened condensed milk, lime juice, and lime zest then mix again until smooth.
- Bake: Pour over prepared graham cracker crust and bake in preheated oven for 10 minutes. Allow to cool for about 30 minutes, then refrigerate for at least 3 hours, before serving.
- Serve: Top with a dollop of fresh whipped cream, if desired.
Leave a Reply