
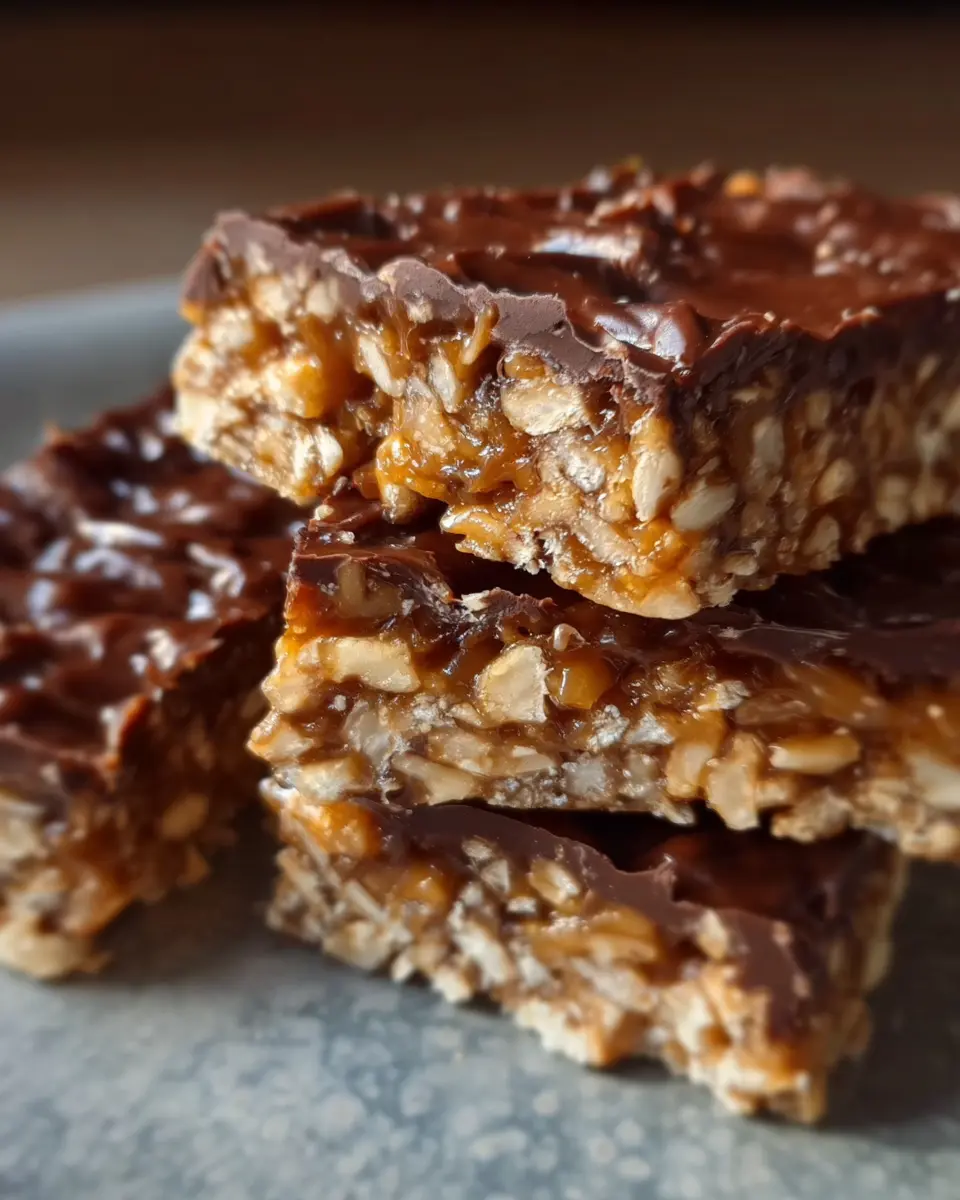
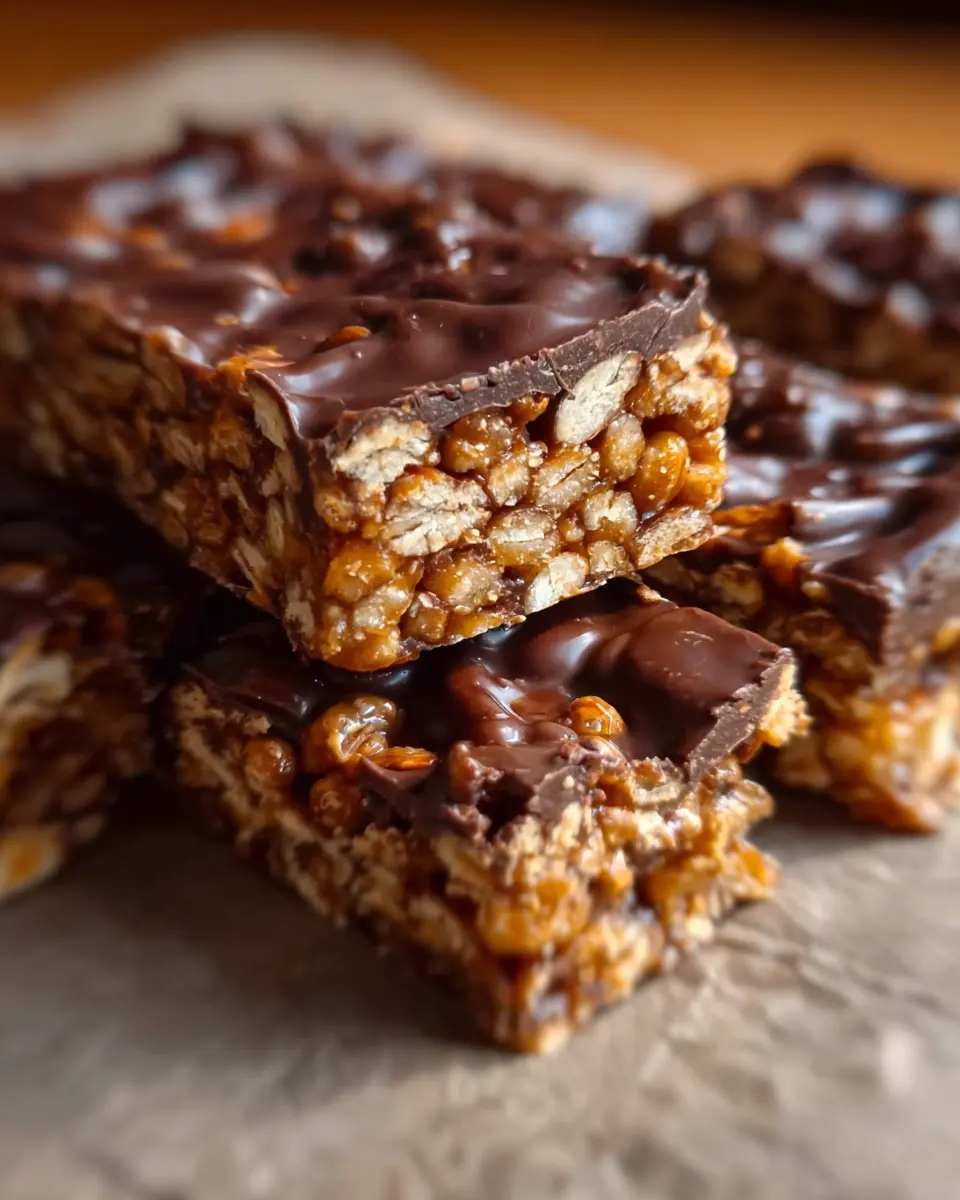
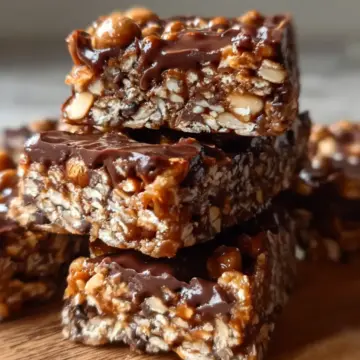
Introduction to Homemade Crunch Bars
Why Homemade Crunch Bars are a Game Changer
Have you ever craved something sweet and crunchy but found the store-bought options lacking in flavor or texture? Enter Homemade Crunch Bars! These delicious treats are not only easy to make, but they also allow you to customize flavors and enjoy the freshest ingredients.
Making your own crunch bars means you have control. Say goodbye to artificial additives and preservatives and hello to simple, wholesome ingredients. With just a handful of pantry staples like chocolate chips, peanut butter, and puffed rice cereal, you can whip up a batch in no time. Plus, it’s an excellent opportunity to involve the whole family in the kitchen, making it a fun activity to bond over.
You might be wondering, “Why not just buy them?” Well, according to studies, homemade snacks can be healthier, as they often contain fewer calories and added sugars than processed alternatives. By crafting your own, you’ll also save money in the long run!
So, grab your ingredients, and let’s dive into creating these delicious Homemade Crunch Bars! They’re perfect for satisfying your sweet tooth while keeping your health goals intact. Be prepared to enjoy a snack that’s both tasty and guilt-free!
For more snack ideas, check out this article on healthy snacks.
Ingredients for Homemade Crunch Bars
Essential Ingredients for Crunch Bars
Creating Homemade Crunch Bars is simple and requires just a few essential ingredients that you likely already have in your pantry. Here's what you'll need:
- 1 cup chocolate chips: Rich and creamy, they form the base of your bars.
- 1 cup puffed rice cereal: This is key for that delightful crunch factor.
- ½ cup peanut butter: A must for that creamy texture and nutty flavor.
- ¼ cup honey or maple syrup: Adds sweetness and helps bind everything together.
- ½ teaspoon vanilla extract: A splash of vanilla enhances the overall flavor.
- 1 pinch salt: Just a touch balances the sweetness.
These ingredients combine to create an irresistible treat perfect for snacking or dessert.
Optional Add-ins to Elevate Your Bars
Feeling adventurous? Consider enhancing your Homemade Crunch Bars with a few optional add-ins:
- Chopped nuts: Almonds or walnuts add protein and crunch.
- Dried fruit: Raisins or cranberries introduce a chewy texture and natural sweetness.
- Mini marshmallows: For a fun, gooey twist.
- Coconut flakes: Adds a tropical flair and chewiness.
Adding these ingredients allows you to customize your bars to fit your taste preferences, making snack time even more exciting! Need more ingredient inspiration? Check out this source for diverse variations you can try.
Preparing Homemade Crunch Bars
Creating Homemade Crunch Bars is an enjoyable experience that doesn’t require culinary expertise. With just a few simple steps, you can whip up these scrumptious treats right in your kitchen. Let’s dive into the process!
Gather Your Ingredients
Before baking, it’s essential to ensure you have everything you need at hand. Here’s what you’ll require for these delightful bars:
- 1 cup chocolate chips: You can opt for dark, semi-sweet, or even milk chocolate, depending on your taste!
- 1 cup puffed rice cereal: This adds the characteristic crunch—think of it as the star of the show!
- ½ cup peanut butter: Creamy or chunky, whichever you prefer will work.
- ¼ cup honey or maple syrup: This acts as a sweetener and binder.
- ½ teaspoon vanilla extract: A splash adds depth to the flavor.
- 1 pinch salt: This enhances the overall taste.
Having these ingredients ready will streamline your baking process.
Melt the Chocolate and Peanut Butter
Now, the fun part: melting the chocolate and peanut butter! In a medium microwave-safe bowl, combine your chocolate chips and peanut butter. Microwave them in 30-second intervals, stirring in between until you achieve a smooth and melty texture. This step is crucial—it’s where the magic happens! The combination of chocolate and peanut butter creates a luscious mix that binds everything together beautifully.
Mix in Sweeteners and Vanilla
Once your chocolate and peanut butter are perfectly blended, it’s time to enhance the flavor. Stir in the honey or maple syrup, along with the vanilla extract and a pinch of salt. This step not only sweetens your bars but also gives them a warm, inviting flavor profile. Make sure everything is well combined; you want each bar to be consistently delicious.
Fold in the Puffed Rice Cereal
With the yummy chocolate-peanut butter mixture ready, it’s time to add the puffed rice cereal. Gently fold it into the mixture until all the cereal is evenly coated. This step is essential for that satisfying crunch we all love in Homemade Crunch Bars. Take your time here; ensuring each piece is covered will elevate the taste and texture of the final product.
Press into the Baking Dish
Next, take out your prepared baking dish (about 8x8 inches works perfectly) lined with parchment paper. Pour the mixture into the dish, using a spatula to press it down firmly. Make sure to create an even layer—this will help in achieving even slices later on.
Let Them Chill
Finally, it’s time for a little patience. Place the dish in the refrigerator and let the bars chill for at least one hour. This cooling period allows the mixture to set and firm up, making it easy to cut them into squares. Once set, lift out the bars using the parchment paper and slice into your desired shapes.
These Homemade Crunch Bars are great for snacking, dessert, or when you need a quick energy boost! Enjoy experimenting, and don’t forget to share your creations with friends and family!

Variations on Homemade Crunch Bars
Add Nuts for Crunchy Texture
If you're looking to elevate your Homemade Crunch Bars, consider tossing in some nuts! Almonds, peanuts, or even walnuts can add a delightful crunch and nutrition boost. Simply chop them up and fold them in along with the puffed rice. Not only will you satisfy your texture cravings, but you'll also introduce healthy fats and protein. Feel free to explore nut butters like almond or cashew for a distinct flavor twist.
Switch It Up with Different Sweeteners
Have you ever thought about varying the sweetener in your Homemade Crunch Bars? While honey and maple syrup are favorites, alternatives like agave nectar or brown rice syrup offer unique flavors and sweetness levels. Each option brings its own health benefits and taste profile, allowing you to customize your snack to suit your dietary needs. Plus, using less processed sweeteners can make your treats even more wholesome!
Explore these variations to make the perfect batch of Homemade Crunch Bars that suits your palate!
Cooking Tips and Notes for Homemade Crunch Bars
How to Achieve the Perfect Texture
For Homemade Crunch Bars with the ideal crunch, ensure your puffed rice cereal is fresh and lightly folded into the chocolate-peanut butter mixture. Overmixing can lead to a dense texture that sacrifices that delightful crispiness. Also, pressing the mixture firmly into the baking dish is crucial—this helps the bars hold together when you slice them.
Storage Tips for Freshness
To keep your Homemade Crunch Bars tasting fresh, store them in an airtight container in the refrigerator for up to a week. If you’ve made a big batch, feel free to freeze them for up to three months. Just remember to thaw them overnight in the refrigerator for the best experience! For more tips on preserving homemade snacks, check out this resource on food storage.
Serving Suggestions for Homemade Crunch Bars
Pairing with Fresh Fruit
Elevate your Homemade Crunch Bars by serving them alongside fresh fruit! The sweetness of berries or the tartness of sliced apples pairs deliciously with the rich chocolate and peanut butter flavors. Imagine enjoying a chocolatey crunch alongside juicy strawberries or refreshing watermelon wedges. This combination not only satisfies your sweet tooth but also adds nutritional value to your snack. Plus, it's a fun way to incorporate more vitamins into your diet! For an extra indulgent twist, drizzle some honey over the fruit for added sweetness.
Serving as an Energy Boost Snack
These Homemade Crunch Bars are perfect as an energy boost snack, especially before or after a workout. With a mix of protein from the peanut butter and carbs from the cereal, they provide a quick source of fuel. Wrap them individually and toss them in your gym bag or keep a stash at your desk for those afternoon slumps. You can also break them into smaller pieces and toss them into a trail mix with nuts and seeds for an extra crunchy pick-me-up!
Time Breakdown for Homemade Crunch Bars
Preparation Time
Getting started on your Homemade Crunch Bars is a breeze—just 15 minutes of prep! Gather your ingredients, mix them up, and prepare your baking dish to set the stage for this delicious treat.
Chill Time
Patience is key here! You'll need to let your bars chill in the refrigerator for at least 1 hour. This is when the flavors meld beautifully together, ensuring a perfect bite every time.
Total Time
In total, you’re looking at about 1 hour and 15 minutes from start to finish. With minimal effort, you'll soon have a delightful batch of crunch bars ready to enjoy or share with friends and family.
For additional tips on making the perfect snack, check out this guide for more ideas.
Nutritional Facts for Homemade Crunch Bars
Calories per Serving
Each serving of these Homemade Crunch Bars contains approximately 150 calories. This makes them a satisfying yet lighter treat option that won’t derail your healthy eating goals.
Key Nutritional Elements
These bars are not just delicious; they also pack a punch in terms of nutrition:
- Healthy Fats: The combination of peanut butter contributes beneficial fats, promoting satiety.
- Protein: With peanut butter as a key ingredient, you'll gain some protein, which is essential for muscle repair and energy.
- Fiber: Using puffed rice cereal adds a source of fiber, aiding digestion and keeping you full longer.
Feel free to explore more about balancing healthy snacks with Dietitian resources from EatRight.org. By making Homemade Crunch Bars, you're opting for a treat that’s not only tasty but also offers nutritional benefits. Enjoy a delicious snack without the guilt!
FAQ about Homemade Crunch Bars
How Long Do Homemade Crunch Bars Last?
Once you whip up a batch of these delicious Homemade Crunch Bars, they'll last in the refrigerator for up to a week. Just be sure to store them in an airtight container to keep them fresh. If you're looking to extend their lifespan, you can also freeze them! They can last in the freezer for about three months. Just remember to thaw them in the refrigerator overnight before enjoying; that way, they’ll be ready when you are.
Can I Make Them Vegan?
Absolutely! To create a vegan version of your Homemade Crunch Bars, simply swap out the honey for maple syrup, and choose dairy-free chocolate chips. The creamy texture of peanut butter is already plant-based, making this an easy transition. You'll still enjoy that delightful crunch and satisfaction, minus the animal products.
What’s the Best Way to Cut Them?
Cutting your bars can be a bit tricky, but using a sharp knife or a pizza cutter can make the process smoother. Before cutting, make sure your crunch bars are fully chilled and firm; this ensures clean edges and less crumbling. Lining your pan with parchment paper also helps when lifting out the bars for clean cuts. Enjoy the process!
Conclusion on Homemade Crunch Bars
In closing, Homemade Crunch Bars are not just a delicious treat; they’re a simple and satisfying way to elevate your snack game. With minimal ingredients and a quick prep time, these bars are perfect for anyone, from busy professionals to families. Keep a batch on hand and enjoy a heartwarming snack anytime!
For more delightful ideas, check out this healthy snack guide.
Homemade Crunch Bars
Equipment
- Baking Dish
- microwave
- spatula
Ingredients
Main Ingredients
- 1 cup chocolate chips
- 1 cup puffed rice cereal
- ½ cup peanut butter
- ¼ cup honey or maple syrup
- ½ teaspoon vanilla extract
- 1 pinch salt
Instructions
Preparation
- Line a baking dish (about 8x8 inches) with parchment paper.
- In a medium microwave-safe bowl, combine the chocolate chips and peanut butter. Microwave in 30-second intervals, stirring in between, until smooth and melted.
- Stir in the honey or maple syrup, vanilla extract, and a pinch of salt until well combined.
- Gently fold in the puffed rice cereal until all the cereal is evenly coated with the chocolate-peanut butter mixture.
- Pour the mix into the prepared baking dish. Using a spatula, press the mixture down firmly to create an even layer.
- Place the dish in the refrigerator and let it chill for at least 1 hour.
- Once set, lift the bars out using the parchment paper and slice them into squares.


Leave a Reply