
Introduction to Homemade Cream Puffs
The Allure of Homemade Cream Puffs
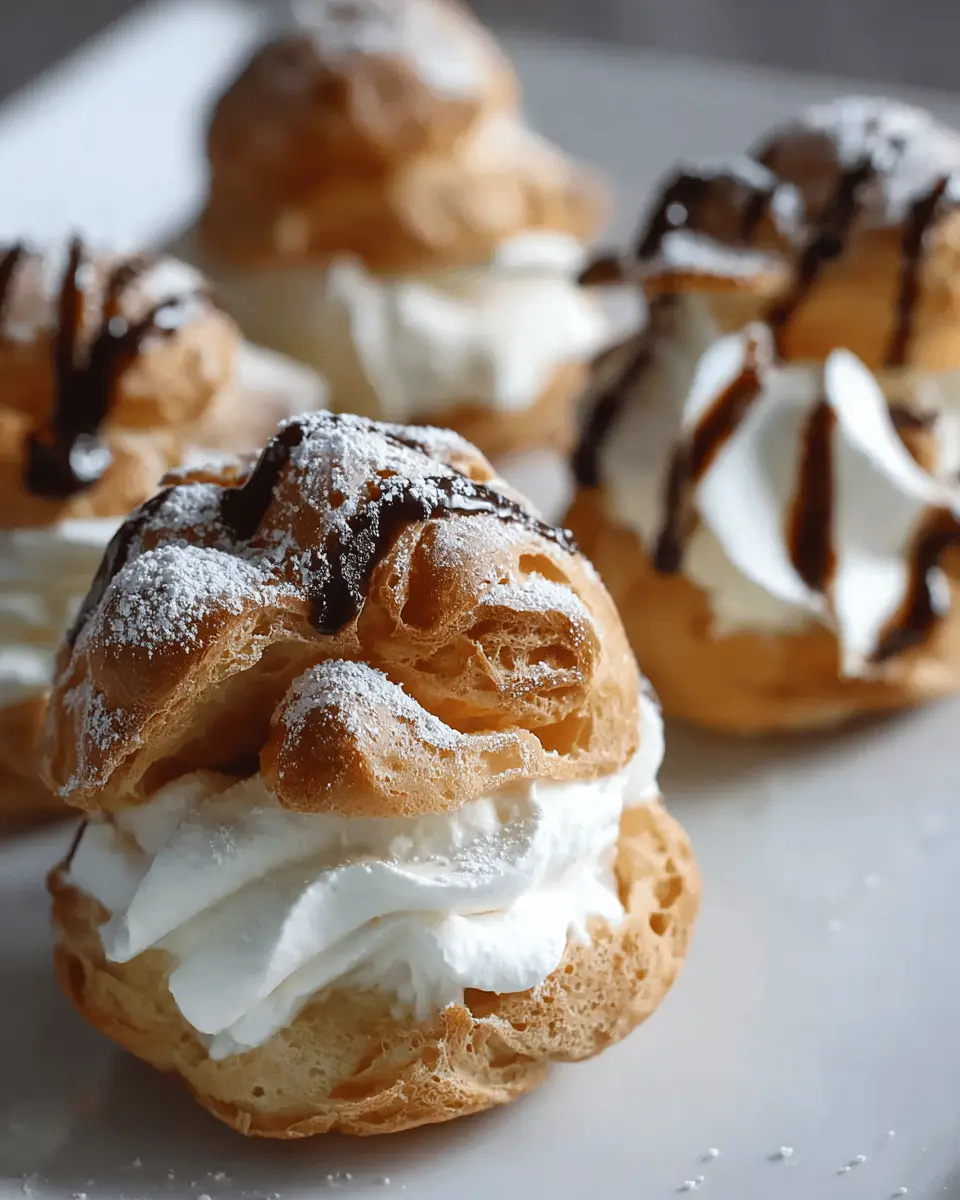
Have you ever indulged in a perfectly light and airy cream puff? The blissful combination of a crispy choux pastry shell and rich, luscious filling makes these treats irresistible. Making homemade cream puffs not only impresses your guests but also gives you a sense of accomplishment that store-bought pastries simply cannot match.
As you embark on this delightful culinary adventure, remember that the process of creating these French desserts is a rewarding art form that balances precision and creativity. From the moment the dough comes together to the final touch of powdered sugar on top, each step offers a little bit of magic.
Whether you’re planning a fancy dinner party or just want to satisfy that sweet tooth, homemade cream puffs are a fantastic addition to any dessert table. Plus, there are endless opportunities for customization with fillings like flavored whipped cream or chocolate ganache! For a deeper dive into the history of cream puffs, check out resources like the International Culinary Center for insights.
So roll up your sleeves and get ready to impress with delectable homemade cream puffs. Let's explore the recipe and master the art of this French favorite!
Ingredients for Homemade Cream Puffs
Creating delightful homemade cream puffs starts with the right ingredients. Let’s break down what you’ll need for the pâte à choux and the filling.
Essential ingredients for choux pastry
The foundation of your cream puffs is the choux pastry, which relies on just a few simple ingredients:
- Water: 1 ¼ cups, providing moisture for the dough.
- Granulated sugar: 1 teaspoon adds a touch of sweetness.
- Kosher salt: ½ teaspoon enhances flavor.
- Unsalted butter: ½ cup, cut into slices, for richness.
- All-purpose flour: 1 cup, ensures a light and airy texture.
- Large eggs: 4, which give structure and help the pastry rise.
Feel free to explore more about choux pastry techniques in this detailed guide.
Ingredients for whipped cream filling
No cream puff is complete without a luscious filling! For the whipped cream, gather:
- Heavy whipping cream: 2 cups, the star of the filling for its rich texture.
- Powdered sugar: ½ cup sweetens and stabilizes the cream.
- Pure vanilla extract: 1 teaspoon, for a lovely flavor boost.
This combination creates a light and airy filling, perfect for your cream puffs! The blend of textures and flavors is what makes your homemade cream puffs truly memorable.
Step-by-step Preparation of Homemade Cream Puffs
Creating delightful homemade cream puffs is easier than you might think! Follow these steps, and you’ll be impressing friends and family in no time.
Preheat the Oven
First things first: preheat your oven to 425°F (218ºC). Don’t forget to set your oven racks to the upper-middle and lower-middle positions. Line two baking sheets with parchment paper and set them aside. The preheating step is crucial as it ensures even cooking, allowing your puffs to rise beautifully.
Make the Pâte à Choux
In a large, heavy-bottomed saucepan, combine 1 cup of water, sugar, salt, and butter. Bring this mixture to a boil over medium-high heat while stirring until the butter melts. Once melted, remove from heat and add 1 cup of flour immediately. Stir vigorously with a wooden spoon until the mixture forms a cohesive dough. This dough, known as pâte à choux, requires some muscle—but trust me, it's worth it!
Cool the Dough
To ensure you don’t accidentally cook the eggs in the next step, transfer the dough to a stand mixer fitted with a paddle attachment on low speed. Let it cool down to about 130°F (54ºC), which should take just a couple of minutes. This will also give your cream puffs that perfect consistency!
Incorporate the Eggs
Now comes the fun part: adding the eggs! Add them one at a time while mixing on medium-low speed until fully incorporated. You'll want your dough to look shiny and not too runny. If it’s still thick, add the fourth egg. This process is essential for achieving that airy texture we love in homemade cream puffs.
Pipe the Dough
Grab your pastry bag fitted with a large plain tip and fill it with the dough. Pipe 2-inch round mounds onto the prepared baking sheets, making sure to leave around 2 inches between each puff—trust me, they’ll expand! To achieve a smooth finish, dip your finger in water and gently flatten any peaks.
Apply the Egg Wash
For a lovely golden finish, whisk together 1 egg and 1 tablespoon of water in a small bowl. Brush this mixture over the tops of your unbaked puffs. The egg wash not only adds color but helps create that beautiful crust everyone loves!
Bake the Cream Puffs
Pop the baking sheets into the oven without opening the door! Bake at 425°F (218ºC) for 10 minutes, then gradually reduce the temperature to 375°F (191ºC), and then all the way down to 200°F (93ºC) over about an hour. The result should be delightfully light, golden puffs. When they feel light and dry, they're done!
Prepare the Whipped Cream Filling
While your cream puffs cool, let’s whip up that creamy filling! In your mixer, combine 2 cups of heavy cream, powdered sugar, and vanilla extract. Whip until you achieve stiff peaks—this takes just a few minutes. Be careful not to overwhip; we want creamy, not curdled!
Fill the Cream Puffs
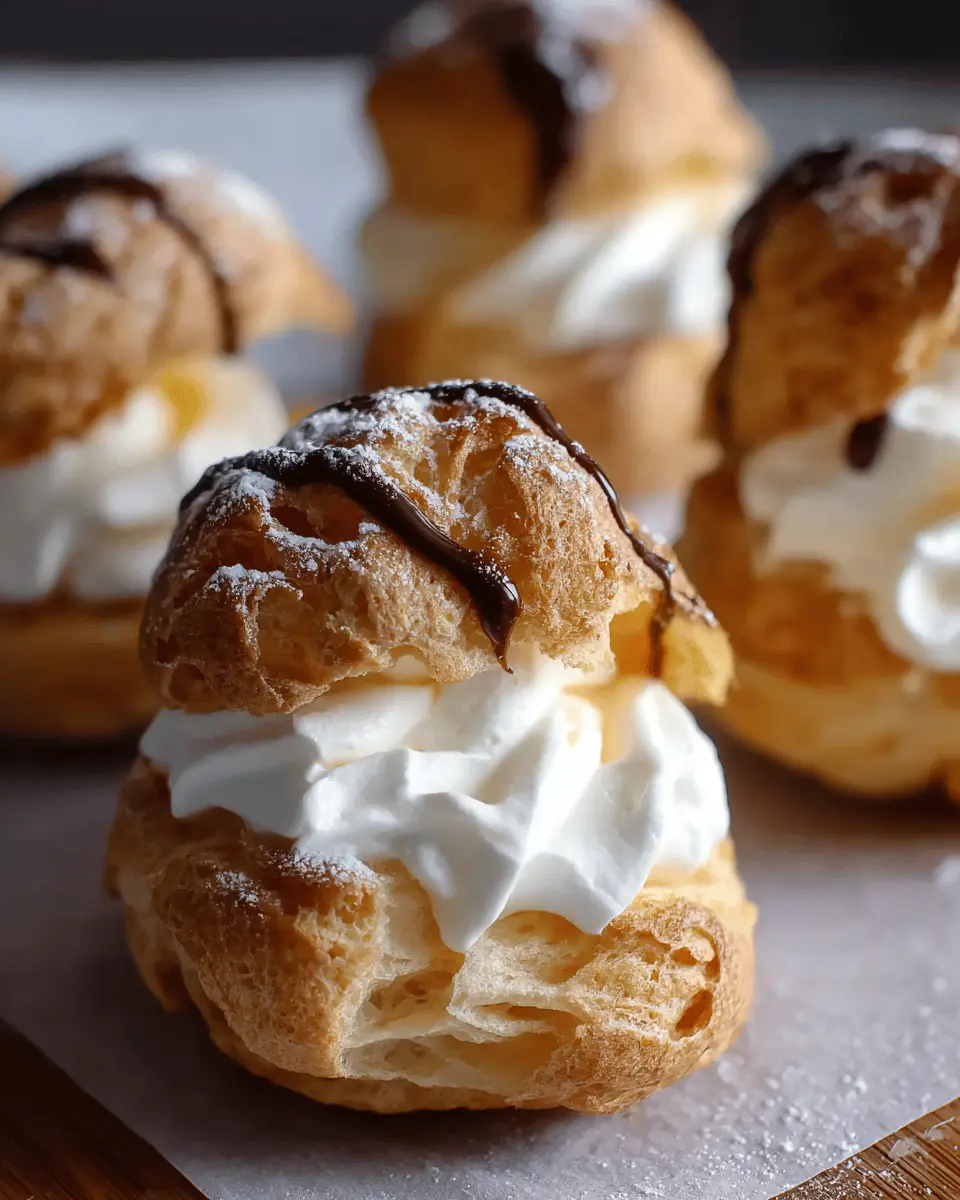
Finally, it’s time to fill the puffs! Using a serrated knife, slice each puff in half. Pipe your luscious whipped cream into the bottom half, then gently place the top back on. For an added touch of sweetness, dust with powdered sugar before serving. Enjoy the lovely crunch along with the creamy filling!
By following these steps, you’re well on your way to mastering homemade cream puffs that will steal the show at your next gathering. Happy baking!
Variations on Homemade Cream Puffs
Chocolate Cream Puffs
Enhance your homemade cream puffs with a rich and indulgent chocolate twist! Simply melt some dark chocolate and fold it into your whipped cream filling for a decadent experience. You can also drizzle chocolate ganache on top for added flair. Imagine biting into a crispy shell, revealing a luscious chocolate center—pure bliss! For a more intense experience, try adding cocoa powder to your pâte à choux for chocolatey shells. Don’t forget to pair these delights with a strong cup of coffee for that perfect dessert moment.
Fruit-Filled Cream Puffs
If you're in the mood for something fresh and fruity, consider filling your homemade cream puffs with seasonal fruit compote or fresh whipped cream mixed with berries. Strawberries, raspberries, or even mango puree make for delightful fillings, bringing a vibrant splash of flavor. A sprinkle of citrus zest can further elevate the fruitiness, making each bite refreshing and delightful. Serve these at summer gatherings and watch them disappear—light, fluffy, and oh-so-satisfying! For more fruity inspiration, check out expert dessert blogs like The Kitchn.
Cooking Tips and Notes for Homemade Cream Puffs
Tips for perfecting the pâte à choux
To achieve the light and airy texture essential for homemade cream puffs, focus on the dough. Make sure your butter is fully melted before adding the flour, allowing it to create a smooth mixture. Remember, when mixing in the eggs, add them one at a time and mix well. This is key for getting that perfect consistency—shiny and firm, but not runny. When piping, keep the shape consistent for even baking.
Suggestions for storing unfilled cream puffs
For optimal freshness, store your unfilled cream puffs in an airtight container at room temperature for up to 5 days. If you want to keep them longer, you can freeze them for up to a month. Before filling, reheat in a 300°F oven for about 5 to 10 minutes to restore their crispiness. This way, you'll always have delicious cream puffs at the ready! For further insights on storage, check out this detailed guide from Serious Eats.

Serving Suggestions for Homemade Cream Puffs
Creative Ways to Present Cream Puffs
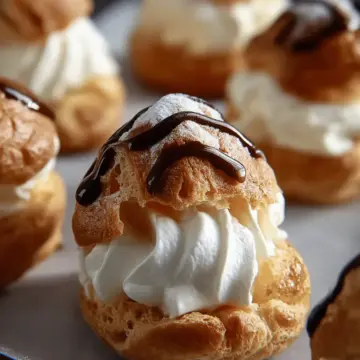
Homemade cream puffs not only taste delightful but also make an impressive presentation. Consider plating them on a tiered dessert stand for a charming touch at gatherings. You can dust them with powdered sugar or even dip them in melted chocolate for an elegant flair.
Adding fresh berries or edible flowers around the puffs elevates the overall look and adds a splash of color. Lastly, for a fun twist, arrange them in a circular pattern on a large platter, drizzling with caramel sauce for added visual appeal.
Pairing Ideas for Cream Puffs
Enhance your cream puff experience by pairing them with complementary flavors. A rich cup of coffee or elegant tea like Earl Grey works beautifully, while a scoop of vanilla or berry sorbet can provide a refreshing contrast. For an adventurous choice, try pairing your cream puffs with a tangy citrus sauce or a fruit compote, which can balance the sweetness of the whipped cream.
Exploring these pairing ideas can take your homemade cream puffs from simple dessert to a full culinary delight! For more tips on enhancing desserts, check out sources like BBC Good Food or Serious Eats.
Time Breakdown for Homemade Cream Puffs
When it comes to making delicious homemade cream puffs, timing is everything! Here’s how the process breaks down:
Preparation time
Expect to dedicate about 30 minutes for prepping the ingredients and making the dough.
Cooking time
The baking process takes around 1 hour and 15 minutes, so patience is key!
Total time
In total, you’ll be looking at about 1 hour and 45 minutes from start to finish. Perfect for an afternoon baking session when you need a delightful dessert to impress!
Feel free to explore more about the technique of making choux pastry at Serious Eats or dive into the science of baking at King Arthur Baking. You'll find great tips to enhance your homemade cream puffs!
Nutritional Facts for Homemade Cream Puffs
Calories per cream puff
Each homemade cream puff contains approximately 116 calories. They make for a delightful treat without excessive guilt!
Key nutritional details
These elegant pastries are not only delicious but offer a balance of nutrients:
- Carbohydrates: 10g
- Protein: 3g
- Fat: 7g (with 4g saturated fat)
- Cholesterol: 66mg
- Sodium: 94mg
With a light sweetness from the whipped cream and minimal sugar, cream puffs can fit into a diverse diet. Perfect for special occasions or just a little indulgence! For more on portion sizes, check this nutrition guide.
FAQs about Homemade Cream Puffs
Why did my cream puffs deflate?
Deflation can often be traced back to a few common culprits. One of the biggest reasons is opening the oven door during baking, which can upset the temperature balance. Additionally, if the choux pastry dough was too wet, or the eggs were added too quickly, it could prevent proper puffing. Make sure to follow the recipe closely for the best results!
Can I make cream puffs in advance?
Absolutely! You can prepare the pâte à choux and bake the shells a day ahead. Just store them in an airtight container at room temperature. For longer storage, freeze the unfilled shells, then reheat them at a low temperature to restore their crispness before filling with whipped cream.
What’s the best way to store cream puffs?
To preserve their texture, it’s best to serve homemade cream puffs the same day they're made. If you need to store them, keep them in the refrigerator, uncovered, for up to three days. This way, they retain their freshness without getting too soggy. Want to dive deeper into storage tips? Check out this comprehensive guide on puff pastry storage.
Conclusion on Homemade Cream Puffs
Embracing the Art of Homemade Desserts
Homemade cream puffs are more than just a dessert; they’re an experience. With a little practice, you’ll master the choux pastry technique, impressing friends or simply indulging in a delightful treat. Remember, the joy of baking lies not just in the outcome but in the process itself. Enjoy!
Homemade Cream Puffs: The Best Indulgent Treat You'll Love
Equipment
- stand mixer
- Cooling Rack
- Pastry Bag
- Plain Pastry Tip
- Star Pastry Tip
Ingredients
Pâte à Choux
- 1 ¼ cup water divided
- 1 teaspoon granulated sugar
- ½ teaspoon kosher salt
- ½ cup unsalted butter cut into 8 slices
- 1 cup all-purpose flour spoon and leveled
- 4 large eggs
- ¼ cup powdered sugar for dusting
Egg Wash
- 1 large egg
- 1 tablespoon water or milk
Whipped Cream
- 2 cups heavy whipping cream or heavy cream
- ½ cup powdered sugar or granulated sugar
- 1 teaspoon pure vanilla extract
Instructions
Instructions
- Preheat the Oven - Set the oven racks to upper-middle and lower-middle positions. Preheat to 425°F (218ºC). Line two sheet pans with parchment paper and set them aside.
- Make the Dough - In a large heavy-bottomed saucepan, add 1 cup of water, sugar, salt, and butter. Bring to a boil over medium-high heat and stir until the butter fully melts, about 2 minutes.
- Cool the Dough - Transfer the dough to a bowl of a stand mixer fitted with a paddle. Slowly stir on low speed (setting 2) to cool to 130°F (54ºC) or just below, about 2 to 3 minutes.
- Add the Eggs in Stages - Add eggs one at a time, mixing on medium-low speed (setting 4) until each egg is fully incorporated, about 30 to 45 seconds per egg.
- Piping the Dough - Add a large plain tip to a piping bag. Pipe onto the sheet pan, creating a 2-inch circular ball.
- Brush on Egg Wash - In a small bowl, whisk together one egg and 1 tablespoon of water. Brush the tops and sides of each dough ball with the egg wash.
- Gradual Baking Process - Place the sheet trays in the oven. Bake for 10 minutes at various temperature settings, about 60 to 70 minutes of total baking time.
- Make the Whipped Cream - In a stand mixer fitted with the whisk attachment, whip heavy cream, powdered sugar, and vanilla until smooth, stiff peaks form.
- Piping the Cream - Add the whipped cream to a pastry bag and pipe into the pastry bottoms.
- Top with Sugar - Sprinkle powdered sugar on top of each cream puff. Serve immediately.
Leave a Reply