
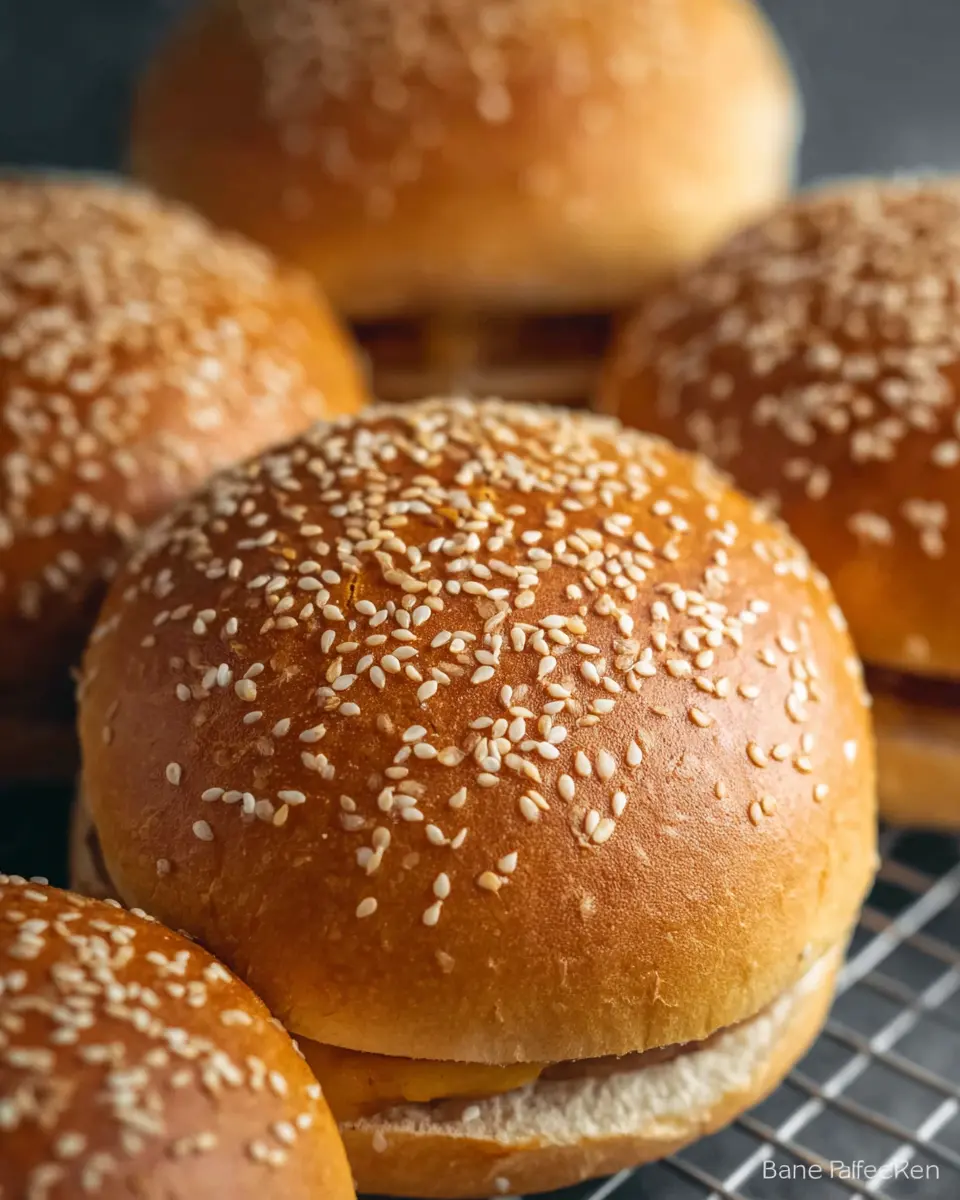
Introduction to Homemade Hamburger Buns
If you’ve ever bitten into a store-bought hamburger bun and felt it lackluster compared to the deliciousness of the patty it holds, it’s time to explore homemade hamburger buns. The effort might seem daunting at first, but trust me, it’s completely worth it. Here’s why.
Why Homemade Hamburger Buns Are Worth the Effort?
Freshness Is Key
When you make your own buns, you can guarantee they are fresh and fluffy. There’s just nothing quite like the aroma of bread baking in your kitchen! The texture and taste of fresh hamburger buns far surpass those generic options sitting on the supermarket shelf.
Customize to Your Liking
Additionally, making buns at home allows you to customize ingredients. You can choose high-quality flour, add herbs, or even make them gluten-free! This level of control means every bite can cater to your specific taste and dietary needs.
A Fun Culinary Project
Plus, baking can be a fun and rewarding experience! Invite friends over, make a day of it, and enjoy your creations together. Not only will you impress your guests with your homemade skills, but you’ll also create lasting memories.
For those eager to try their hands at this rewarding culinary venture, check out Serious Eats for tips on perfecting your dough techniques!
Ingredients for Hamburger Buns
Essential ingredients for perfect buns
To whip up delicious hamburger buns, you'll need a few essential ingredients that come together to create a soft and fluffy texture. Here's your shopping list:
- Water: 1 ½ cups, warms to activate the yeast.
- Active Dry Yeast: 2 ¼ teaspoons (one packet) for that perfect rise.
- Sugar: ¼ cup to nourish the yeast and add a hint of sweetness.
- Butter: 3 tablespoons, softened, for a rich flavor.
- Eggs: 1 whole plus 1 egg yolk, adding moisture and binding.
- Salt: 1 ½ teaspoons, enhances flavor.
- Unbleached All-Purpose Flour: 4 ½ - 5 ½ cups, forms the structure of your buns.
These simple ingredients work together to deliver the ultimate hamburger bun experience!
Suggested substitutes for common allergens
If you're dealing with allergies or dietary restrictions, don’t worry — there are alternatives for some of the key ingredients:
- Gluten-free Flour: Use a 1:1 gluten-free blend in place of all-purpose flour.
- Dairy-free Butter: Swap regular butter with a plant-based option for a dairy-free bun.
- Aquafaba: Replace eggs with 3 tablespoons of aquafaba (chickpea brine) to keep it vegan.
Whichever route you take, these buns can be tailored to fit your needs! Happy baking!
Step-by-step Preparation of Hamburger Buns
Creating your homemade hamburger buns is a rewarding experience! Follow this step-by-step guide to ensure your buns are fluffy, tasty, and perfect for any kind of sandwich.
Activate the yeast
Begin by activating the yeast, which is the magic ingredient that makes your buns rise. In a small bowl, mix 1 ½ cups of warm water, 2 ¼ teaspoons of active dry yeast, and ¼ cup of sugar. Let this mixture sit for 5-10 minutes until it becomes frothy. This step is crucial because it ensures the yeast is alive and ready to work its magic in your dough. If you want to learn more about yeast activation and its importance in baking, check out this article.
Combine wet ingredients
In a large mixing bowl or stand mixer, whisk together the frothy yeast mixture, one whole egg, one egg yolk (save the white for later), 3 tablespoons of softened butter, and 1 ½ teaspoons of salt. This step combines essential flavors and moisture that will enhance the texture of your buns.
Gradually add flour
Now, for the fun part! Gradually add in 4 ½ to 5 ½ cups of unbleached all-purpose flour, one cup at a time. Mix until the dough starts to form a ball. You might not need all the flour, so keep an eye on the consistency. A slightly sticky dough is ideal—this means your buns will be soft and delicious.
Knead the dough
Transition to kneading the dough. If you're using a stand mixer, knead on low speed for about 5 minutes, or do it by hand for around 10 minutes. The goal here is to develop the gluten, which creates that lovely structure in your buns.
First rise
Cover the dough with a clean kitchen towel and let it rise in a warm space for 1 ½ to 2 hours, or until it has doubled in size. This is your dough’s time to shine—make sure to resist the urge to open the lid too frequently!
Shape the buns
Once risen, gently deflate the dough and divide it. For hamburger buns, slice the dough into equal pieces. For larger buns, cut each half into six pieces, making a total of 12. Roll each piece into a ball and then flatten them gently—this helps them maintain their shape as they rise again.
Second rise
Place the shaped buns on a baking sheet lined with parchment paper and cover them. Let them rise for another 30-60 minutes until they're slightly puffy. This additional rise contributes to the lightness of the finished hamburger buns.
Prepare for baking
While the buns are rising, preheat your oven to 350°F (175°C). Prepare an egg wash by mixing the reserved egg white with a tablespoon of water. Brush this mixture over the buns, then sprinkle sesame seeds on top if you like a bit of crunch and flavor.
Bake the buns
Bake the buns in the preheated oven for 18-22 minutes until they are golden brown. Your kitchen will smell amazing after this point!
Cooling and slicing
Once baked, remove the buns from the oven and let them cool on a wire rack. Resist the urge to slice them immediately; letting the buns cool completely will ensure that they maintain their structure and texture when you cut into them.
And there you have it—your homemade hamburger buns! Use these fluffy delights for your favorite burgers, pulled turkey bacon, or even grilled chicken ham sandwiches. Enjoy your baking adventure!
Variations on Hamburger Buns
When it comes to hamburger buns, variety can elevate your burger experience. Here are some delicious options to consider!
Whole Wheat Hamburger Buns
For a wholesome twist, try making whole wheat hamburger buns. These buns offer a nutty flavor and a hearty texture, making them a great choice for those seeking a healthier option. Simply substitute half or all of the all-purpose flour with whole wheat flour. Your buns will not only be more nutritious, but they'll also deliver a delightful chew, perfectly complementing your favorite beef or turkey bacon patties.
Gluten-Free Hamburger Buns
If you're following a gluten-free diet, don’t worry! You can whip up gluten-free hamburger buns using a blend of gluten-free flours such as almond flour, coconut flour, or a gluten-free all-purpose mix. Adding xanthan gum can help mimic the elasticity of traditional flour. These buns can be just as soft and satisfying, allowing everyone to enjoy a tasty burger, regardless of dietary restrictions.
Trying these variations can lead to a fun baking adventure right in your kitchen! Interested in more tips on making these or other alternatives? Check out resources on King Arthur Baking for gluten-free dough techniques or The Whole Grains Council for healthy baking insights.
Cooking Tips and Notes for Hamburger Buns
Ensuring the Perfect Texture
To achieve those irresistibly soft hamburger buns, it’s essential to knead your dough properly. Kneading develops gluten, giving your buns that fluffy texture we all adore. Don’t hesitate to incorporate a bit of extra flour if your dough feels sticky, but be cautious—overdoing it can lead to dry buns. Aim for a slightly tacky texture to keep them soft and delightful.
Importance of Temperature in Baking
When baking hamburger buns, temperature plays a critical role. Making sure your water is lukewarm (around 110°F) helps activate the yeast, providing a good rise. Additionally, remember to check your oven temperature with an oven thermometer! An accurate temperature ensures even baking, preventing burnt edges while keeping your buns golden brown and fluffy. For an added boost, let your dough rise in a warm spot, like an oven set to its lowest setting. Happy baking!
For more tips on bread making, here are some helpful resources: King Arthur Baking and The Bread Baker’s Apprentice.
Serving Suggestions for Hamburger Buns
Perfect pairings for your homemade buns
There’s nothing quite like sinking your teeth into a juicy burger on a freshly baked hamburger bun. To elevate your meal, consider filling those buns with:
- Turkey Bacon and avocado for a flavorful twist
- Beef patties topped with sharp cheddar and caramelized onions
- A classic chicken ham and Swiss cheese combo, finished with a drizzle of honey mustard
These combinations not only enhance the taste but also add variety to your meals.
Creative uses beyond burgers
Don’t stop at just burgers; your hamburger buns can shine in other meals too! Try them as:
- Sliders for gatherings, filled with mini meatballs or crab cakes
- A base for delicious breakfast sandwiches loaded with eggs and cheese
- A fun way to serve pulled beef or BBQ chicken for a casual dinner
Feel free to get creative—your hamburger buns are versatile enough to delight at any meal!
Time Breakdown for Hamburger Buns
Preparation Time
You’ll spend about 30 minutes preparing the ingredients and kneading your dough. It’s that initial hustle that sets the stage for delicious hamburger buns!
Rising Time
Let the dough work its magic during the 2 hours and 30 minutes of rising time. This is when your buns will puff up beautifully, so be patient!
Baking Time
Finally, the buns will need 18 to 22 minutes in the oven. You’ll know they’re ready when they turn a lovely golden brown.
Total Time
All in all, you’re looking at a total time of approximately 3 hours and 18 minutes. While you’re waiting for those hamburger buns to rise, why not prep some tasty toppings for your burgers?
Nutritional Facts for Hamburger Buns
Calories per bun
Each hamburger bun packs about 90 calories, making them a relatively light choice for a hearty burger or sandwich. This means you can enjoy your favorite toppings without feeling too guilty!
Key nutrients
Beyond the calories, these buns provide essential nutrients. They typically contain:
- Carbohydrates: 13g
- Protein: 2g
- Fat: 4g (with 2g being saturated)
- Fiber: 1g
These ingredients contribute to not only the taste but also the overall nutrition of your meal. For a more in-depth understanding of the nutritional benefits of bread, check out the Whole Grains Council.
Whether you're loading up your hamburger buns with classic beef patties or experimenting with veggie alternatives, they're a delightful base for a variety of meals!
FAQs about Hamburger Buns
Can I freeze homemade hamburger buns?
Absolutely! Freezing your homemade hamburger buns is a fantastic way to extend their shelf life. Once the buns have completely cooled, simply wrap them tightly in aluminum foil or place them in an airtight freezer bag. They can last for up to three months in the freezer. When you're ready, just thaw them at room temperature or pop them in the microwave for a quick reheating.
How long do they last after baking?
If stored properly in an airtight container at room temperature, fresh hamburger buns can last for about 3 to 5 days. If you live in a humid climate, consider refrigerating them to prevent mold. For even longer freshness, freezing is always a great option!
What’s the best way to reheat hamburger buns?
Reheating your hamburger buns is easy! You can wrap them in a damp paper towel and microwave them for about 15-20 seconds. Alternatively, pop them in the oven at 350°F for about 5-7 minutes for that freshly baked taste. Enjoy your delicious creations!
Conclusion on Hamburger Buns
Embrace Homemade Goodness!
Creating your own hamburger buns at home not only enhances the flavor of your meals but also allows you to customize them to suit your taste. Whether you're crafting the perfect burger or a delicious sandwich, these fresh buns are sure to impress. Enjoy the process, and savor the joy of homemade goodness!

Hamburger Buns
Equipment
- stand mixer
Ingredients
Main Ingredients
- 1.5 cups Water
- 2.25 teaspoons Active dry yeast one packet
- 0.25 cups Sugar
- 3 tablespoons Butter softened
- 1 whole Egg
- 1 whole Egg Yolk save white for glazing buns
- 1.5 teaspoons Salt
- 4.5-5.5 cups Unbleached All-Purpose Flour
Egg Wash
- 1 whole Egg white
- 1 tablespoon Water
Topping
- 2 tablespoons Sesame seeds for top of buns, optional
Instructions
Preparation
- Mix water, yeast and sugar together. Let sit for 5-10 minutes until mixture becomes bubbly.
- Add egg, egg yolk, butter, salt, and one cup of flour. Mix together.
- Continue adding flour 1 cup at a time until the dough forms a ball. Once you reach 4 ½ cups of flour, add any remaining flour in small amounts. The amount of flour used will vary.
- Knead in a stand mixer at a low speed for 5 minutes, or for 10 minutes by hand.
- Cover and let rise until doubled, 1 ½ - 2 hours.
- Gently deflate and divide dough in half. Working with one half at a time, divide into equal size pieces.
- Roll each piece into a round shape by using your hand cupped around the dough and making a circular motion.
- Flatter each ball by gently pressing down on the top. Let the buns rest for a few minutes and then press again.
- Place on a baking sheet covered with parchment paper, or lightly sprayed with a non-stick spray.
- Cover and let rise again for 30-60 minutes until slightly puffy.
- Make an egg wash by beating the reserved egg white with water. Use a pastry brush and brush buns with the egg wash. Sprinkle sesame seeds across the top.
- Bake in a preheated 350°F oven for 18-22 minutes until golden brown.
- Remove from baking sheet and cool on a baking rack. Allow the buns to fully cool before slicing.


Leave a Reply