
Introduction to Banana Pudding Poke Cake
If you're on the hunt for a simple yet indulgent homemade dessert, look no further than banana pudding poke cake. This delightful treat combines the comforting flavors of classic banana pudding with the moist, spongy goodness of cake. It’s a throwback to childhood favorites yet elegant enough for your next gathering—perfect for impressing friends or satisfying your sweet tooth at home.
Why Banana Pudding Poke Cake is a Delightful Choice for Homemade Dessert
This poke cake is incredibly versatile, making it a fantastic choice for any occasion. Whether you're hosting a summer barbecue or simply want a cozy dessert during movie night, this cake fits the bill perfectly. The simplicity of using a boxed cake mix makes it beginner-friendly, while the layers of rich banana pudding and whipped topping add a homemade touch that will leave your guests raving.
Plus, the cooling time allows the flavors to meld beautifully, resulting in a deliciously creamy experience with each bite. The crushed Nilla Wafers on top provide the perfect crunch, contrasting with the soft cake and luscious pudding. If you’re eager to impress your friends or family with minimal effort, banana pudding poke cake is your go-to solution!
For a detailed recipe on how to whip up this delightful dessert, check out the full recipe section below.
Ingredients for Banana Pudding Poke Cake
When it comes to creating the ultimate banana pudding poke cake, simplicity and quality are key. This delightful dessert comes together with just a handful of ingredients that you likely already have in your pantry. Here's what you'll need to whip up this delicious treat:
- 1 box yellow cake mix: This serves as the base of our cake; opt for a trusted brand for best results.
- Ingredients for the cake: Make sure to check the box for the specific amounts of eggs, oil, and water you’ll need.
- 2 (3.4-ounce) packages of instant banana pudding: Instant pudding is the secret to that creamy, banana flavor.
- 4 cups cold milk: Whole or 2% milk works best; just avoid skim for a richer texture.
- 8-ounce tub frozen whipped topping (Cool Whip): This adds the light and fluffy topping we all love.
- 20 crushed vanilla wafers: These provide the perfect crunch and enhance the banana pudding experience.
Once you have these components, you're ready to dive into making this scrumptious cake! If you're curious about other variations or tips on selecting quality ingredients, feel free to check out this guide from the USDA. The banana pudding poke cake is sure to become a go-to in your dessert rotation!
Step-by-step Preparation of Banana Pudding Poke Cake
Creating a banana pudding poke cake is an absolute delight, perfect for any gathering or sweet craving. Let's dive into the steps to ensure your dessert turns out as delicious as it sounds!
Gather Your Ingredients
Before you start baking, make sure you have all your ingredients ready. Here’s what you’ll need:
- 1 box yellow cake mix
- Ingredients needed for the cake: eggs, oil, and water (check the box for specifics)
- 2 (3.4-ounce) packages of instant banana pudding
- 4 cups of cold milk (I recommend whole or 2% milk for creaminess; skip the skim)
- An 8-ounce tub of frozen whipped topping, thawed (Cool Whip)
- 20 crushed vanilla wafers for that delightful crunch
Keeping everything on hand will make the process smooth and fun!
Prepare the Yellow Cake Mix
Follow the instructions on the box of your yellow cake mix. Typically, this includes:
- Preheating your oven to 350°F (175°C).
- Mixing the cake ingredients (eggs, oil, and water) in a large bowl.
- Pouring the batter into a greased 9" x 13" baking dish.
Bake according to the package directions, around 30 minutes, or until a toothpick comes out clean.
Poke Holes in the Baked Cake
Once your cake has cooled for just a couple of minutes, it’s time to let the magic happen! With the handle of a wooden spoon (or a straw, if you want a creative twist), poke holes all over the cake. Aim for the holes to be about an inch apart and go right down to the bottom—this is where the banana pudding will seep in, creating that juicy texture.
Mix the Banana Pudding
In a separate bowl, whisk together your two packages of instant banana pudding with the cold milk. Stir it vigorously until you see a nice, smooth consistency—quickly! You don’t want it to thicken too much before pouring.
Pour Pudding Over the Cake
Carefully pour the banana pudding over your poked cake, making sure to direct it into the holes. Use the back of a spoon to gently spread it, ensuring it fills any gaps. The pudding will seep into those holes, making every bite a burst of banana flavor.
Refrigerate to Set
Now, it’s time to exercise some patience. Cover your cake and pop it in the refrigerator for about 2 hours. This allows the pudding to set up properly, ensuring a soothing, delightful texture in your finished cake.
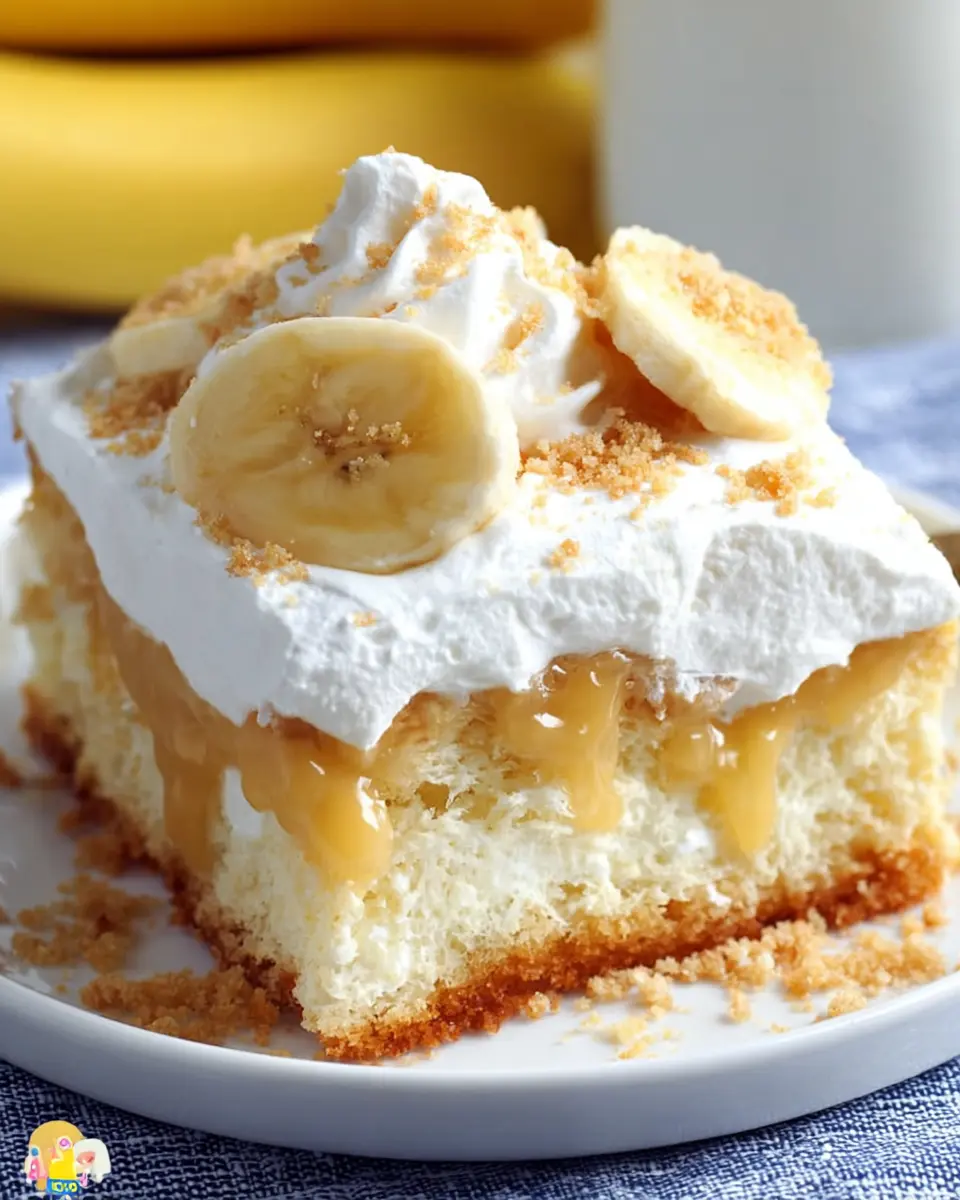
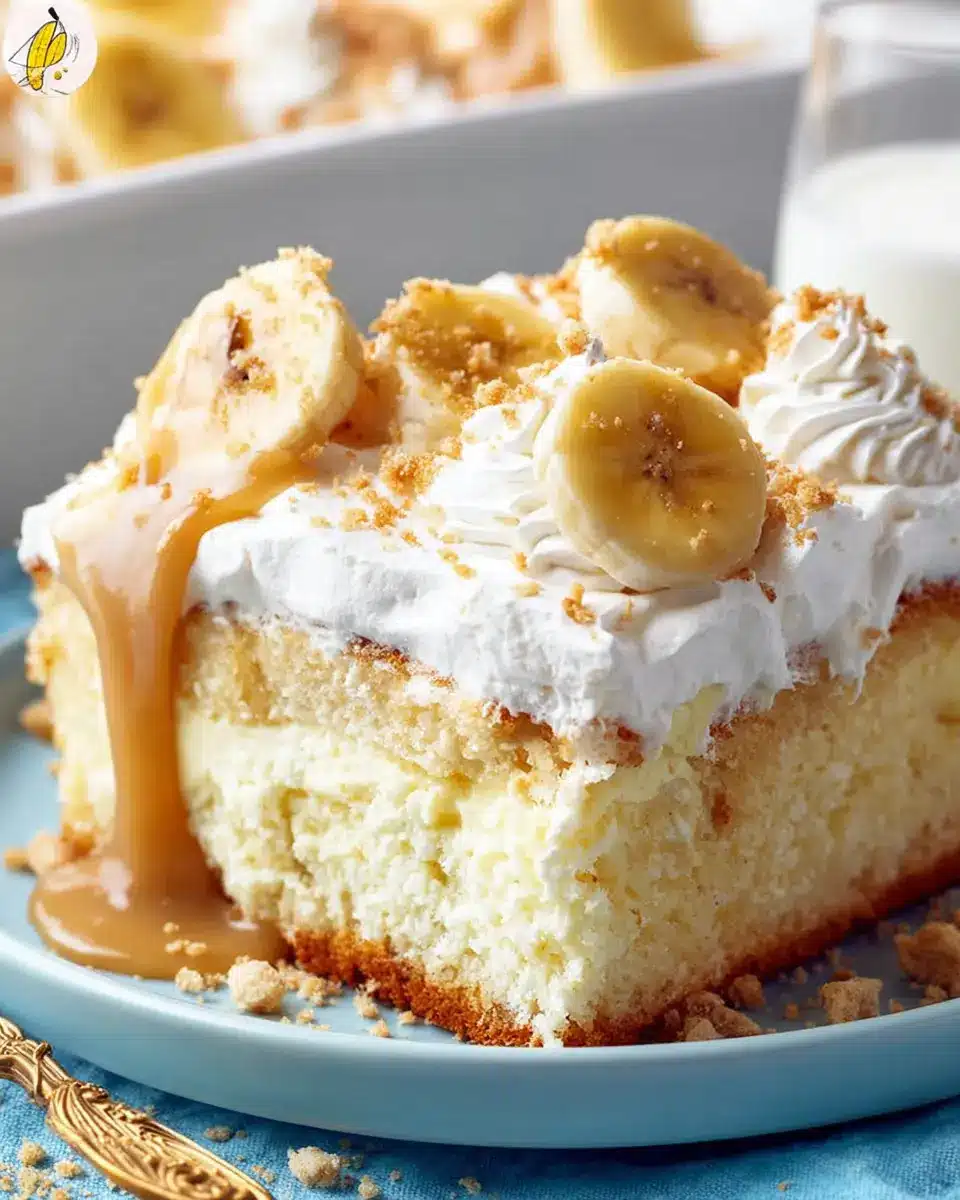
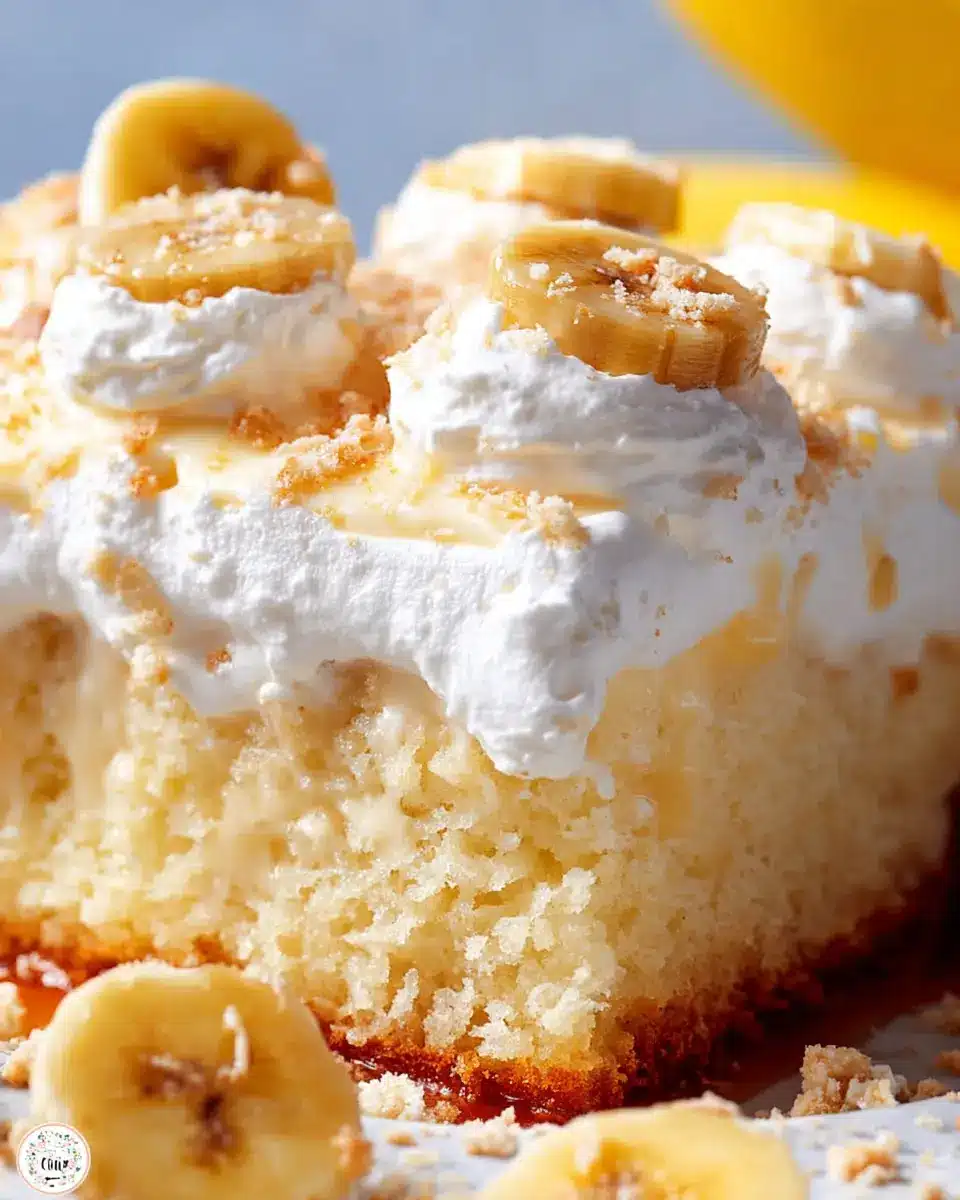
Top with Cool Whip and Crushed Nilla Wafers
Once your cake has cooled and set, it's showtime! Spread the thawed Cool Whip generously over the top. Don’t be shy—this is where a comforting creaminess comes into play! Finally, sprinkle the crushed Nilla Wafers on top for that classic touch and a delightful crunch.
And there you have it: a beautiful banana pudding poke cake ready to impress your friends and family. Enjoy!
Variations on Banana Pudding Poke Cake
Chocolate Banana Pudding Poke Cake
If you're a chocoholic, this chocolate banana pudding poke cake will quickly become your go-to dessert! Simply swap out half the milk in the pudding for chocolate milk or mix in a packet of instant chocolate pudding with your banana pudding for a delightful twist. You can even enhance your cake by adding chocolate chips to the batter before baking. Top it off with a rich chocolate ganache or crushed chocolate cookies for an irresistible finish!
Peanut Butter Banana Pudding Poke Cake
Love peanut butter? This variation combines the classic flavors of banana pudding poke cake with that nutty goodness. Just fold in a half cup of creamy peanut butter into the banana pudding mixture before pouring it over the cake. For an extra treat, layer sliced bananas and crushed peanut butter cookies on top of your Cool Whip layer. It’s a delicious, nutty twist that pairs perfectly with the sweetness of bananas.
Explore these variations to elevate your dessert experience! Want to discover more dessert ideas? Check out this guide on easy cake mix recipes.
Cooking Tips and Notes for Banana Pudding Poke Cake
Creating a delicious banana pudding poke cake is easier than you might think! Here are a few handy tips to help you along the way:
-
Poke Holes Carefully: When poking holes in the cake, use the handle of a wooden spoon, but make sure to not poke too excessively. You want enough holes for the pudding to seep in but also maintain the integrity of the cake.
-
Chill Time is Key: Allowing your cake to set in the refrigerator for at least two hours is crucial. This step not only helps the flavors meld but ensures that the pudding thickens properly.
-
Crush the Wafers Right: For the topping, crush your Nilla Wafers just before serving. This keeps them crunchy and adds a delightful texture contrast to the creamy pudding.
Need more tips? Check out resources on cake baking techniques or dessert presentations for extra inspiration!
Serving Suggestions for Banana Pudding Poke Cake
When it comes to enjoying your banana pudding poke cake, the possibilities are endless! Here are some delicious ways to serve it:
- Fresh Bananas: Top your cake slices with additional sliced bananas for an extra burst of flavor and a pop of freshness.
- Whipped Cream Delight: Add an extra dollop of whipped cream on each slice for that delightful, creamy texture.
- Nuts Please: Consider sprinkling a few chopped nuts, like walnuts or pecans, for added crunch.
- Berry Bliss: Serve it alongside berries—strawberries or blueberries complement the banana flavor beautifully.
This dessert is best enjoyed chilled, making it perfect for warm weather gatherings or dinner parties. For more tips, check out resources on seasonal desserts!
Time Breakdown for Banana Pudding Poke Cake
Preparation Time
Get ready to whip up this banana pudding poke cake in just 25 minutes! You’ll spend this time gathering your ingredients and mixing the cake batter.
Baking Time
After prep, the cake bakes for about 30 minutes. This step allows the delicious aroma to fill your kitchen, making everyone eager for dessert!
Total Time
From start to finish, you'll have this delightful dessert ready in just 45 minutes, but don’t forget to add an extra 2 hours for the cake to set in the refrigerator. Perfect for making ahead of time!
For expert tips on making cakes, check out King Arthur Baking.
Nutritional Facts for Banana Pudding Poke Cake
When it comes to desserts, it's important to be mindful of the nutritional content without sacrificing enjoyment. Here’s a quick breakdown of what's in a slice of your delightful banana pudding poke cake:
Calories
One generous slice contains approximately 270 calories. Perfect for satisfying your sweet tooth without completely derailing your meal plan.
Protein
This cake packs in around 3 grams of protein, mainly from the milk and whipped topping, providing a little nutritional boost.
Sugar
With about 27 grams of sugar per slice, this dessert is undoubtedly sweet! Enjoy it in moderation, especially if you’re keeping an eye on your sugar intake.
For more insights on balancing treats like this banana pudding poke cake with a healthy lifestyle, check out resources from Nutrition.gov or the American Heart Association. Remember, moderation is key!
FAQs about Banana Pudding Poke Cake
Can I make banana pudding poke cake in advance?
Absolutely! One of the best things about banana pudding poke cake is that it can be made ahead of time. In fact, chilling it in the refrigerator for a few hours or overnight enhances the flavors and textures. Just make sure to cover it well to prevent any drying out or absorption of other fridge odors.
What can I substitute for Cool Whip?
If you're not a fan of Cool Whip or prefer a different option, you can use homemade whipped cream instead. Just whip together heavy cream and a bit of sugar to your desired stiffness. Coconut whipped cream is also a fantastic non-dairy alternative that pairs wonderfully with banana flavors.
How should I store leftover poke cake?
To keep your banana pudding poke cake fresh, store it in the refrigerator in an airtight container. It’s best enjoyed within 3-5 days, but often, it doesn’t last that long! For tips on freezing, consider portioning it out and wrapping slices tightly in plastic wrap, followed by foil, for a quick dessert later.
For more tips on storing desserts, check out this guide from FoodSafety.gov.
Conclusion on Banana Pudding Poke Cake
In conclusion, the banana pudding poke cake is a delightful and easy-to-make dessert that brings joy to any gathering. With its layers of flavor and creamy texture, this cake is sure to impress friends and family alike. Make your next celebration even sweeter by trying this recipe! For similar dessert ideas, check out this lush chocolate cake or delicious fruit trifle.

Banana Pudding Poke Cake
Equipment
- 9" x 13" baking dish
Ingredients
Cake Ingredients
- 1 box yellow cake mix
- 1 each eggs as per package instructions
- 1 each oil as per package instructions
- 1 each water as per package instructions
Pudding Ingredients
- 2 packages instant banana pudding 3.4 ounces each
- 4 cups cold milk whole or 2% milk preferred
Topping Ingredients
- 8 ounces frozen whipped topping thawed (Cool Whip)
- 20 each vanilla wafers crushed
Instructions
Preparation
- Prepare 1 box yellow cake mix with ingredients as per package directions for a 9x13-inch cake.
- Once cake comes out of the oven, allow it to cool for just a couple of minutes.
- With a wooden spoon handle, poke holes in the cake, ensuring they are big enough for the pudding to seep in.
- In a bowl, whisk together 2 packages of instant banana pudding with 4 cups cold milk until lumps are gone.
- Pour pudding over the cake, focusing on the holes first.
- Gently push pudding down into the holes with the back of a spoon.
- Refrigerate the cake to set and cool for about 2 hours.
- Once the cake has cooled completely, spread the thawed whipped topping over the top.
- Sprinkle crushed vanilla wafers on top before serving. Keep refrigerated.
Leave a Reply