
Introduction to Red Velvet Cheesecake
If you’re a busy young professional looking to impress your friends or treat yourself, red velvet cheesecake is an ideal dessert choice. This show-stopping dessert combines the rich flavors of classic cheesecake with the trademark allure of red velvet cake, making it not just delicious but visually stunning, too.
Why Red Velvet Cheesecake is the Perfect Dessert for Young Professionals
In today's fast-paced world, many of us seek quick yet impressive recipes that offer both flavor and flair. This red velvet cheesecake hits the sweet spot perfectly. It's a relatively straightforward recipe that can be prepped in under 30 minutes. You can easily prepare it the night before, allowing ample time for it to set, which means less stress on the day of your gathering.
Moreover, when you present this cheesecake with its beautiful layer of cream cheese frosting, you'll surely be the star of the show. According to a recent study from the American Baking Association, desserts with vibrant colors, like this one, are perceived as more appealing and can elevate the dining experience. Not only do you satisfy your sweet tooth, but you also gain the opportunity to impress your guests with your culinary skills without spending the entire day in the kitchen.
With just a little effort, you can serve a delightful blend of flavors that caters to your busy lifestyle while making you look like a culinary superstar!
Ingredients for Red Velvet Cheesecake
Creating a delicious red velvet cheesecake is all about selecting high-quality ingredients that complement each other perfectly. Here's a breakdown of what you'll need.
Essential Ingredients for the Cheesecake
-
Crust:
-
17 chocolate cream Oreo cookies, crushed
-
¼ cup butter, melted
-
1 tablespoon sugar
-
Filling:
-
3 packages (8 ounces each) cream cheese, softened
-
1-½ cups sugar
-
1 cup sour cream
-
½ cup buttermilk
-
3 tablespoons baking cocoa
-
2 teaspoons vanilla extract
-
4 large eggs, room temperature, lightly beaten
-
1 bottle (1 ounce) red food coloring
-
Frosting:
-
3 ounces cream cheese, softened
-
¼ cup butter, softened
-
2 cups confectioners' sugar
-
1 teaspoon vanilla extract
Optional Ingredients for Added Flavor
For those looking to put a unique twist on your red velvet cheesecake, consider adding:
- Chocolate Chips: Fold in a handful of semi-sweet chocolate chips for extra decadence.
- Nuts: Finely chopped walnuts or pecans can add a delightful crunch.
- Spices: A dash of cinnamon or nutmeg can enhance the flavor profile.
By mixing and matching these ingredients, you're set to create an unforgettable dessert experience! Need more tips? Check out this guide for cheesecakes from the pros.
Step-by-step Preparation of Red Velvet Cheesecake
Creating a red velvet cheesecake is an enjoyable and rewarding baking experience. Let's walk through each step to ensure your dessert turns out as delicious as it looks!
Prepare the Springform Pan
The first step in making your red velvet cheesecake is preparing your springform pan. Begin by preheating your oven to 325°F (163°C). Grab a 9-inch springform pan and wrap it securely with a double layer of heavy-duty foil (approximately 18 inches square). This extra layer will help prevent water from seeping in during the baking process. Grease the interior of the pan with butter or cooking spray to make removing the cheesecake a breeze later on.
Make the Crust with Oreo Cookies
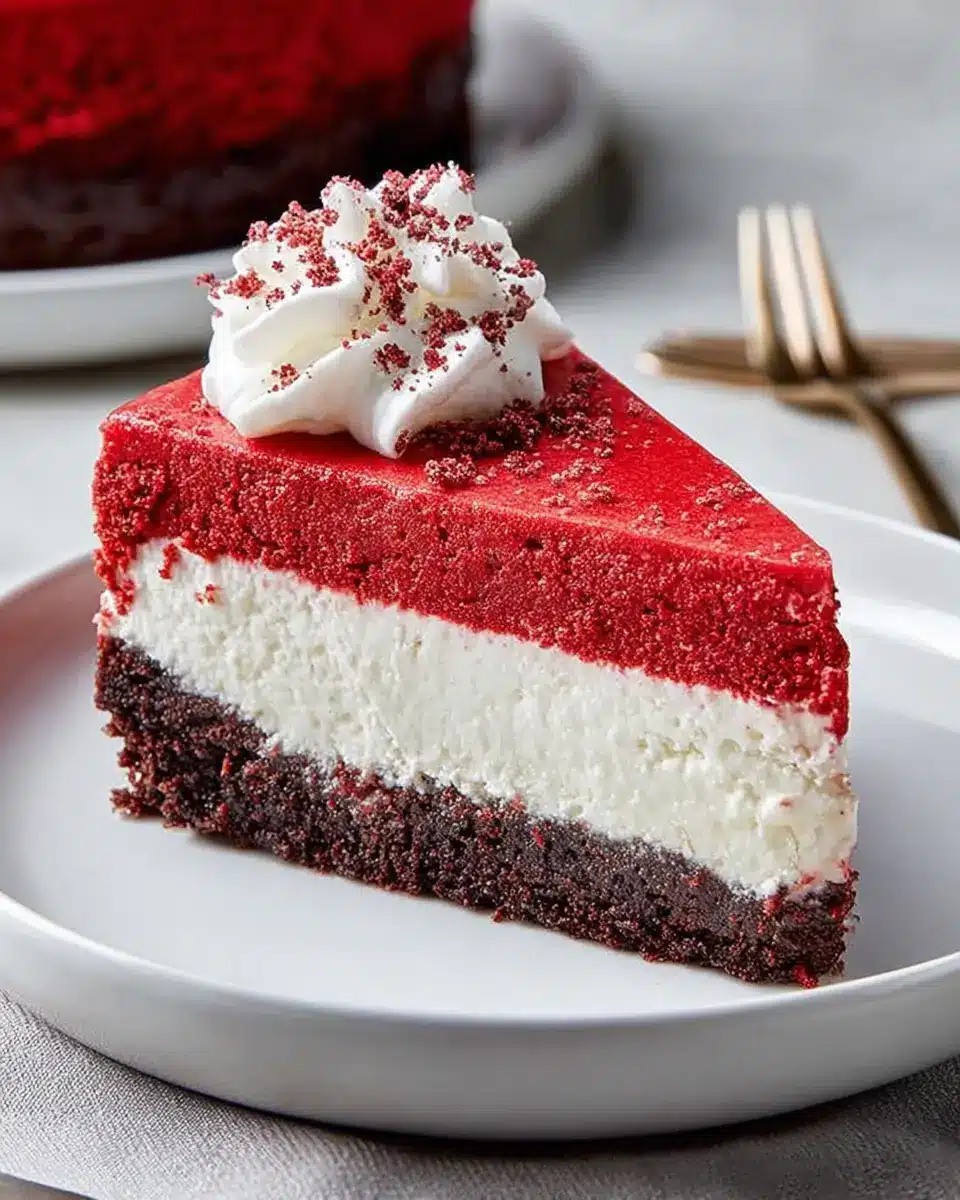
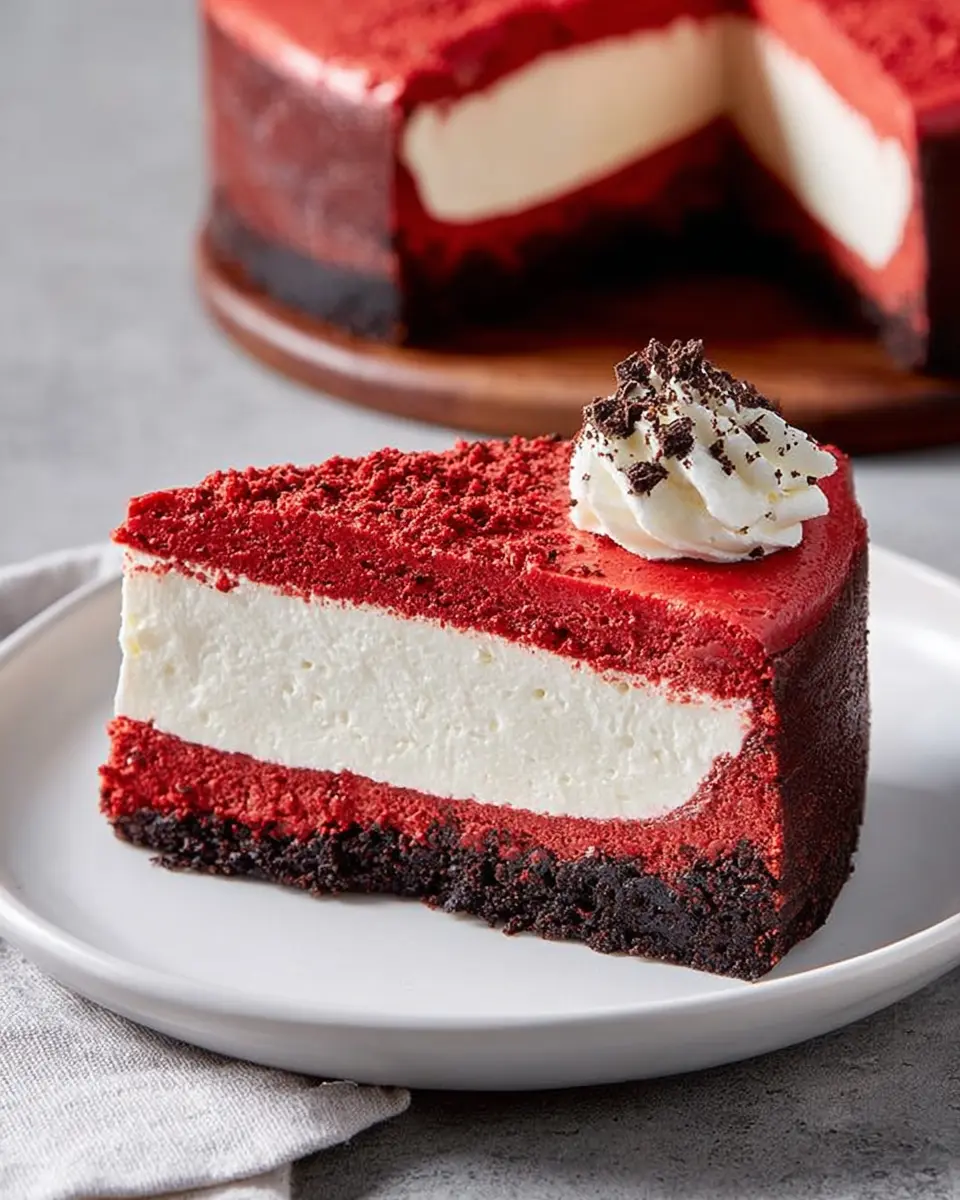
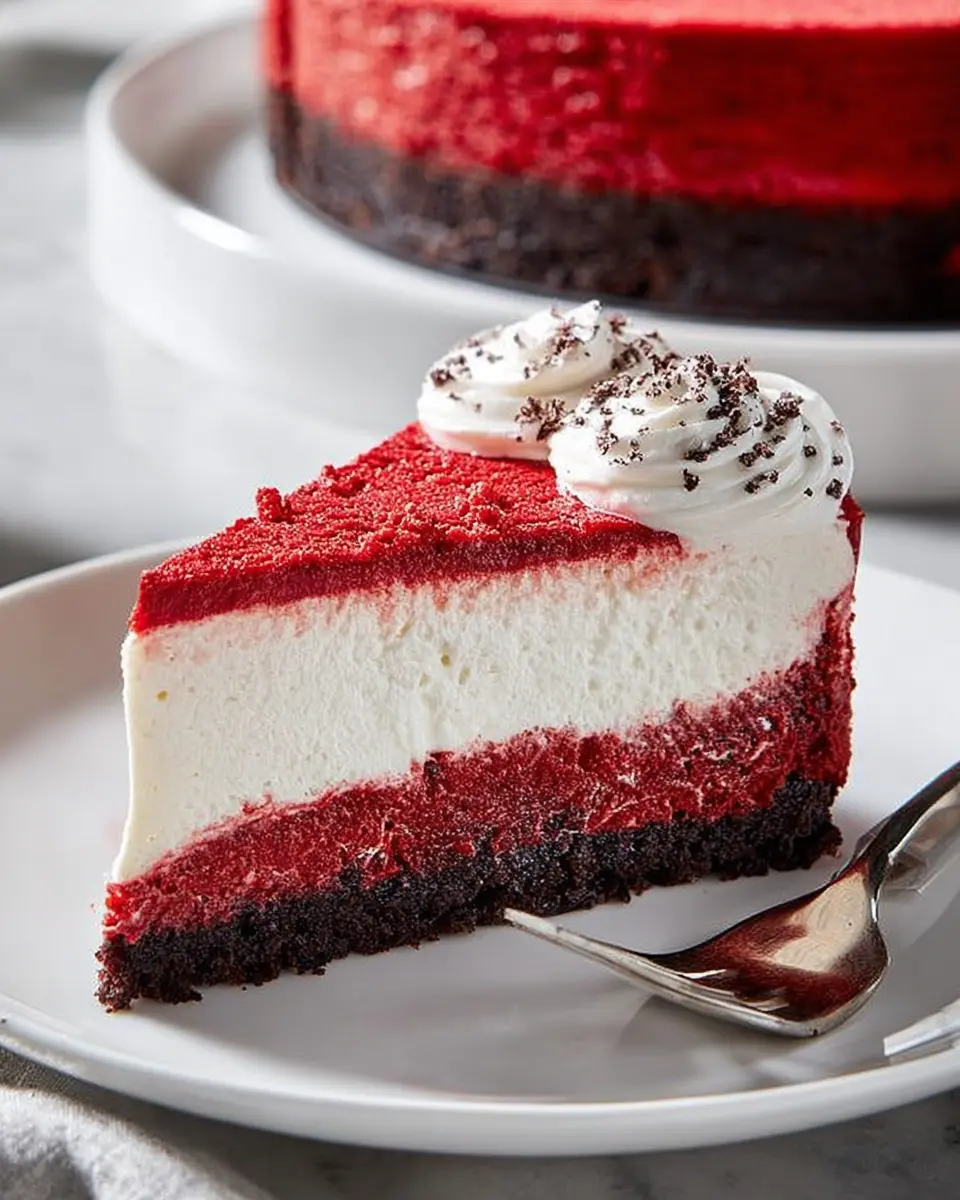
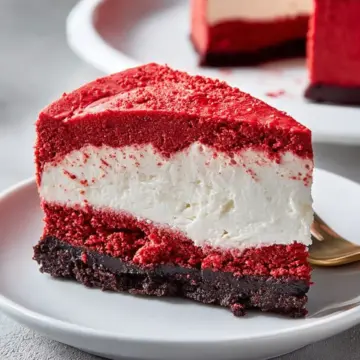
Next, it’s time to create a yummy crust! In a small bowl, combine 17 crushed chocolate cream Oreo cookies with ¼ cup melted butter and 1 tablespoon of sugar. Stir until well combined, then press the mixture firmly into the bottom of your prepared springform pan. This rich, chocolatey crust complements the creamy filling perfectly.
Create the Cheesecake Filling
For the filling, use a large mixing bowl to beat together three packages (8 ounces each) of softened cream cheese and 1 ½ cups sugar until smooth. Then, mix in 1 cup sour cream, ½ cup buttermilk, 3 tablespoons baking cocoa, and 2 teaspoons vanilla extract until everything is well incorporated. Finally, add four lightly beaten large eggs, mixing on low speed to avoid incorporating too much air.
Mix in the Red Food Coloring
Here's where the magic happens! To achieve that stunning red hue, stir in the 1-ounce bottle of red food coloring. Don't be afraid to mix it well until the color is evenly distributed throughout the cheesecake batter. What an eye-catching treat this will be!
Bake the Cheesecake in a Water Bath
Creating a water bath (or bain-marie) is essential for perfect cheesecake texture. Place the springform pan into a larger baking pan and add hot water until it reaches about 1 inch up the side of the springform pan. Bake your cheesecake for 60-70 minutes, or until the center is just set and the top appears dull.
Cool and Refrigerate Overnight
Once baked, remove the springform pan from the water bath and allow it to cool on a wire rack for about 10 minutes. Carefully run a knife around the inside edge of the pan to loosen the cheesecake, then let it cool for an additional hour. Cover and refrigerate overnight to allow the flavors to meld wonderfully!
Prepare the Cream Cheese Frosting
The following day, prepare your cream cheese frosting. In a small bowl, beat together 3 ounces of softened cream cheese and ¼ cup softened butter until fluffy. Add 2 cups confectioners' sugar and 1 teaspoon vanilla extract, beating until the frosting is smooth and creamy. This dreamy frosting will be the perfect finishing touch.
Frost the Cheesecake Before Serving
Before serving your stunning red velvet cheesecake, carefully remove the side of the springform pan. Spread the cream cheese frosting generously over the top. You can swirl it around for an artistic touch if you like! Slice it up, serve it to your friends and family, and watch their faces light up with joy!
By following these easy steps, your homemade red velvet cheesecake will undoubtedly impress anyone lucky enough to have a slice. Enjoy the process, and don’t hesitate to experiment with flavors or toppings to make it uniquely yours!
For more great tips on baking cheesecakes, check out Taste of Home or Joy of Baking!
Variations on Red Velvet Cheesecake
Mini Red Velvet Cheesecakes
Looking to serve a crowd or want individual desserts? Try making mini red velvet cheesecakes. Simply use a muffin tin lined with cupcake liners, fill each cup with the cheesecake batter, and adjust baking time to about 15-20 minutes. These adorable bites are perfect for parties or as a fun, portable treat!
No-Bake Red Velvet Cheesecake
If you’re short on time or prefer a chilled dessert, the no-bake red velvet cheesecake is your go-to option. Replace the baked cheesecake filling with a mixture of cream cheese, whipped cream, and a bit of gelatin to set. Just layer it in your favorite crust and refrigerate until set. No oven required! For more tips on no-bake cheesecakes, check out resources from Serious Eats for guidance.
These variations will let you enjoy the flavors of red velvet cheesecake in multiple ways!
Cooking Tips and Notes for Red Velvet Cheesecake
How to Avoid Cracks in Your Cheesecake
To achieve a smooth red velvet cheesecake without cracks, remember to bake it in a water bath. The steam created helps keep the temperature even, reducing the chance of cracking. Also, avoid overmixing the batter to prevent air bubbles from forming. Finally, once the cheesecake is done, let it cool slowly—if you rush the process, you may sacrifice the appearance!
Best Methods for Mixing Ingredients
For the creamiest texture, always mix your cream cheese until it's fully softened—no lumps allowed! Use a hand mixer on low speed when adding eggs to avoid incorporating too much air. This method ensures a dense, rich filling, which is the hallmark of a perfect red velvet cheesecake. Remember to scrape the bowl sides periodically for an even mix.
For additional insights, check out this cheesecake mixing guide from Cheesecake Lovers!
Serving Suggestions for Red Velvet Cheesecake
Pairing with Fresh Berries
To elevate your red velvet cheesecake, consider serving it with an assortment of fresh berries. Strawberries, raspberries, and blueberries provide a beautiful and vibrant contrast to the rich, creamy cheesecake. Not only do they add a pop of color, but their natural tartness also balances the sweetness of the cheesecake. You can even drizzle them with a light honey syrup for extra indulgence.
Ideal Beverages to Accompany Cheesecake
When it comes to beverages, think outside the box! While coffee is a classic choice, you might also enjoy a refreshing iced tea or a sparkling water with a hint of citrus. These options cleanse the palate while enhancing your dining experience. Experimenting can lead to delightful combinations, so don’t hesitate to mix and match according to your taste preferences!
For more inspiration on beverages that pair well with dessert, check out this guide on pairing drinks with cheesecake.
Time Breakdown for Red Velvet Cheesecake
Preparation Time
Get started with 30 minutes of preparation. This includes gathering your ingredients, prepping the crust, and mixing the luscious filling. It’s the perfect time to crank up some music and enjoy the process!
Baking Time
The baking will take about 1 hour, during which your kitchen will fill with the delightful scent of red velvet cheesecake. Make sure not to rush this step; it’s crucial for achieving that perfect texture.
Chilling Time
After baking, allow the cheesecake to cool for about an hour before refrigerating it overnight. This chilling time is vital as it helps the flavors meld beautifully and sets that rich, creamy filling.
Total Time
In total, you're looking at around 11 hours for this decadent dessert, including prep, bake, and chill time. Trust us, the wait is worth every delicious bite!
For more tips on perfecting your cheesecake skills, check out these cheesecake secrets from Good Housekeeping!
Nutritional Facts for Red Velvet Cheesecake
When indulging in a slice of red velvet cheesecake, it’s helpful to know what’s in it! Here’s a quick breakdown of the nutritional facts for each delectable piece.
Calories per Serving
Each piece of red velvet cheesecake contains approximately 463 calories, making it a rich treat.
Breakdown of Fats, Sugars, and Protein
- Total Fat: 29g (with 17g being saturated)
- Cholesterol: 131mg
- Sodium: 276mg
- Carbohydrates: 46g (includes 39g of sugars)
- Fiber: 1g
- Protein: 7g
For more information on maintaining a balanced diet while enjoying desserts, check out Harvard Health. Remember, moderation is key! Enjoy your slice of heaven!
FAQs about Red Velvet Cheesecake
Can I use a different crust for my cheesecake?
Absolutely! While this red velvet cheesecake recipe calls for a chocolate cream Oreo crust, feel free to experiment. A graham cracker crust or even a gluten-free option can work well. The key is to maintain a sturdy base that complements the rich flavors of the cheesecake.
How long can I store leftover cheesecake?
If you find yourself with leftovers, you’re in luck! You can store your red velvet cheesecake in the refrigerator for up to five days. Just remember to cover it well to keep that incredible flavor intact. For longer storage, consider freezing individual slices. They can last up to two months in the freezer!
What can I substitute for buttermilk in this recipe?
No buttermilk? No worries! You can create a quick substitute by mixing one cup of milk with a tablespoon of vinegar or lemon juice. Let it sit for about five minutes, and you’ll have a perfect buttermilk replacement ready for your red velvet cheesecake. Check out this resource for more substitutes!
Conclusion on Red Velvet Cheesecake
Celebrate with This Delicious Dessert!
In the realm of desserts, few can rival the charm of red velvet cheesecake. With its rich flavors and stunning presentation, it's perfect for celebrations or a cozy night in. Bake this treat for friends or family, and watch them delight in every bite. Enjoy the sweetness!
Red Velvet Cheesecake
Equipment
- 9-inch springform pan
- Mixing Bowls
- electric mixer
- baking pan
Ingredients
Crust
- 17 cookies chocolate cream Oreo cookies, crushed
- ¼ cup butter, melted
- 1 tablespoon sugar
Filling
- 24 ounces cream cheese, softened 3 packages (8 ounces each)
- 1.5 cups sugar
- 1 cup sour cream
- ½ cup buttermilk
- 3 tablespoons baking cocoa
- 2 teaspoons vanilla extract
- 4 large eggs, room temperature, lightly beaten
- 1 bottle (1 ounce) red food coloring
Frosting
- 3 ounces cream cheese, softened
- ¼ cup butter, softened
- 2 cups confectioners' sugar
- 1 teaspoon vanilla extract
Instructions
Preparation
- Preheat oven to 325°. Place a greased 9-in. springform pan on a double thickness of heavy-duty foil (about 18 in. square). Securely wrap foil around pan.
- In a small bowl, combine the cookie crumbs, butter and sugar. Press onto the bottom of prepared pan.
- In a large bowl, beat cream cheese and sugar until smooth. Beat in sour cream, buttermilk, cocoa and vanilla until smooth. Add eggs; beat on low speed just until blended. Stir in food coloring. Pour over crust. Place springform pan in a large baking pan; add 1 in. hot water to larger pan.
- Bake until center is just set and top appears dull, 60-70 minutes. Remove springform pan from water bath. Cool on a wire rack for 10 minutes. Carefully run a knife around inside edge of pan to loosen; cool 1 hour longer. Refrigerate overnight, covering when completely cooled. Remove side of pan.
- For frosting, in a small bowl, beat cream cheese and butter until fluffy. Add confectioners’ sugar and vanilla; beat until smooth. Frost top of cheesecake. Refrigerate until serving.
Leave a Reply