
Introduction to the Best Home-Baked Japanese Cheesecake Recipe
Why Choose Homemade Japanese Cheesecake?
If you’ve ever experienced the delicate delight of a Japanese cheesecake, you know it’s a dessert that truly stands out. Opting to bake it at home offers a world of benefits, from controlling the ingredients to customizing flavors. Homemade versions often feature fewer additives than store-bought options, allowing you to create a dessert that's not only delicious but also healthier! Plus, there's something immensely satisfying about creating a culinary masterpiece from scratch.
The Appeal of a Lighter, Fluffy Dessert
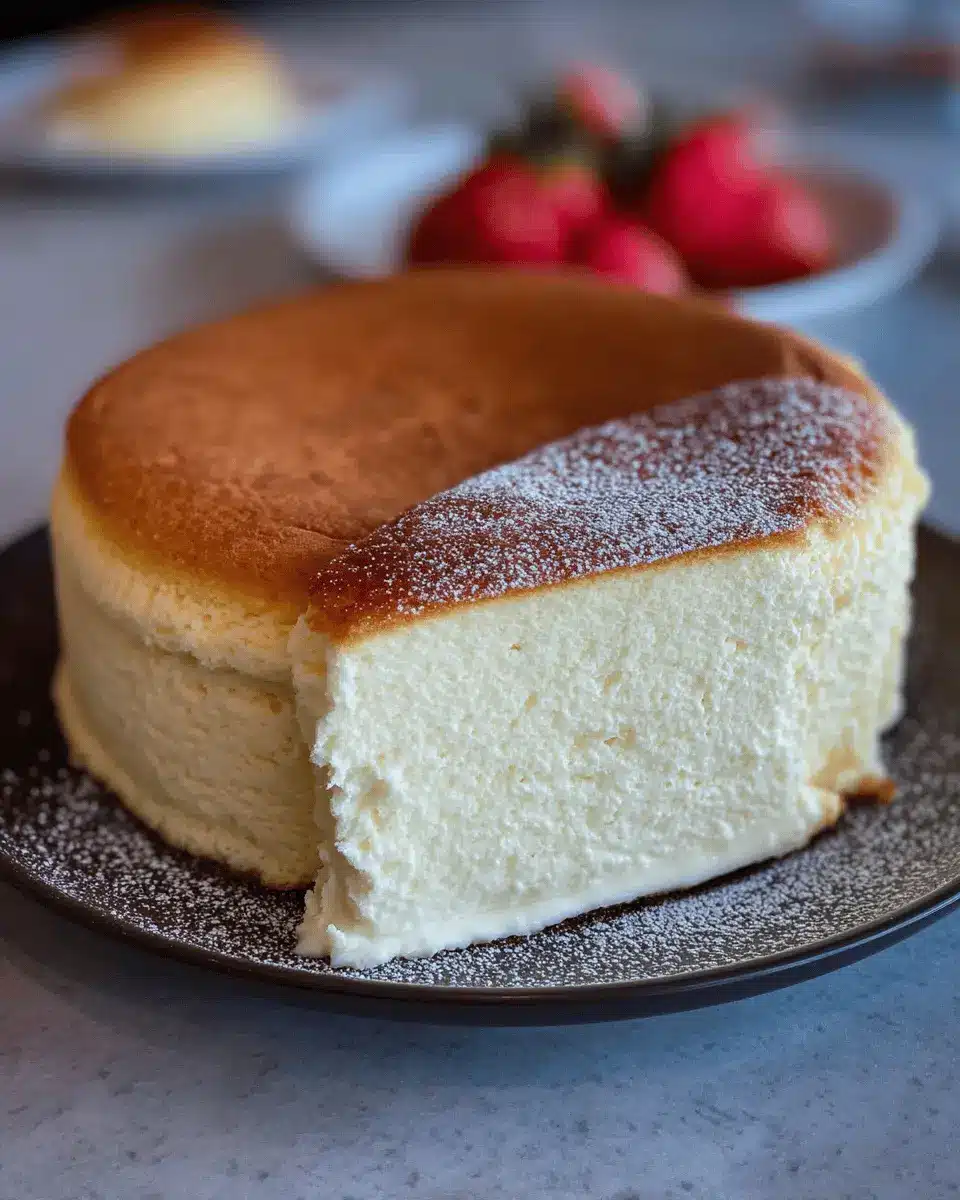
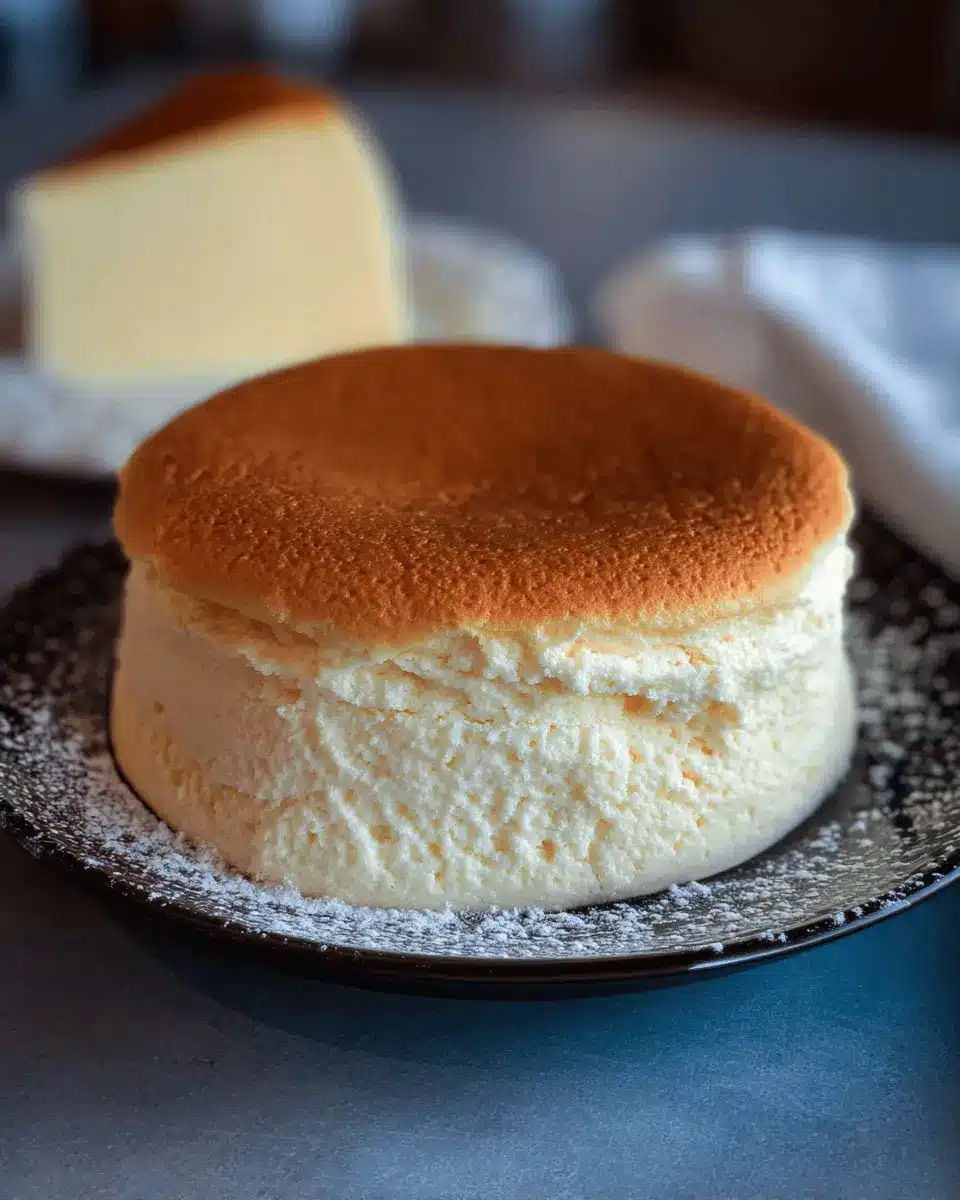
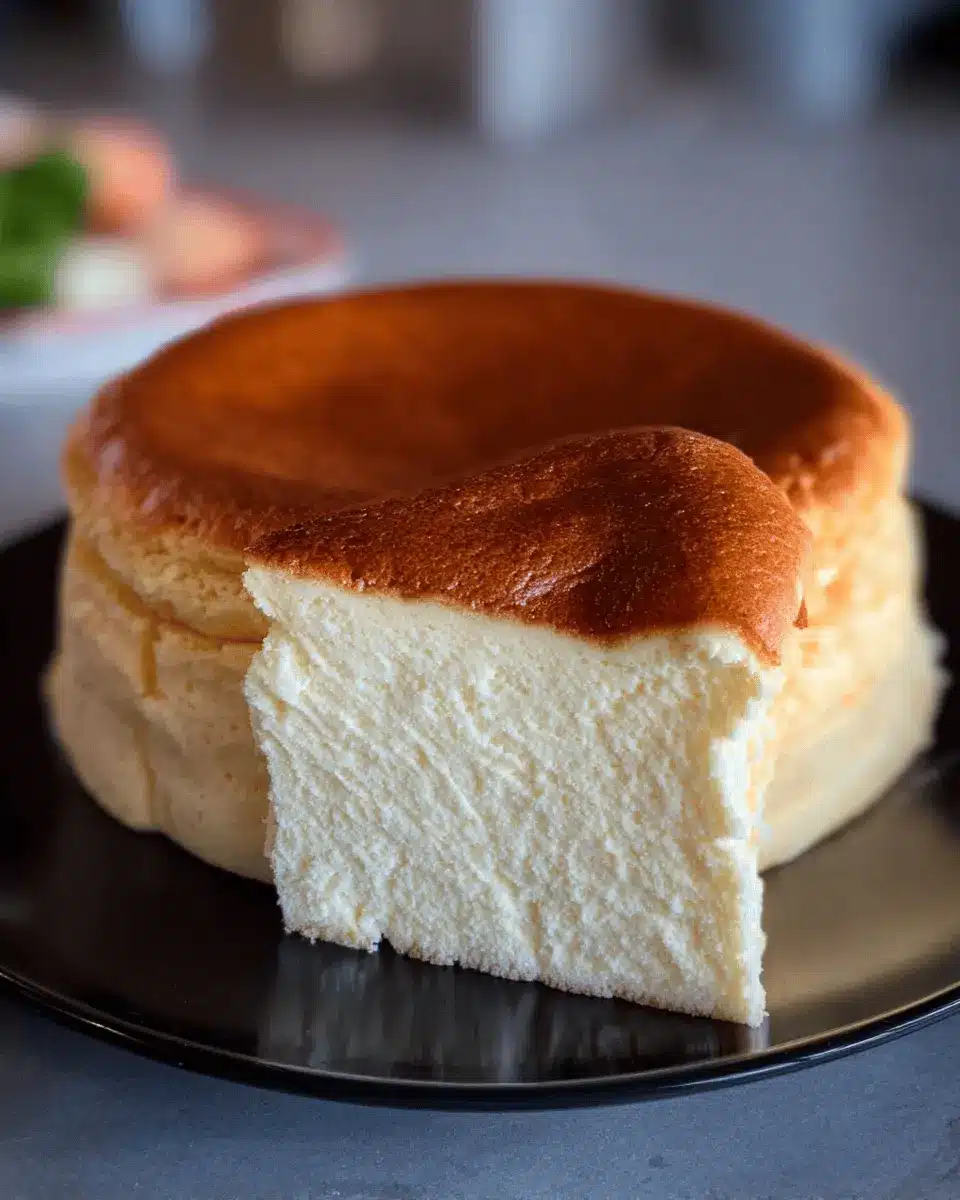
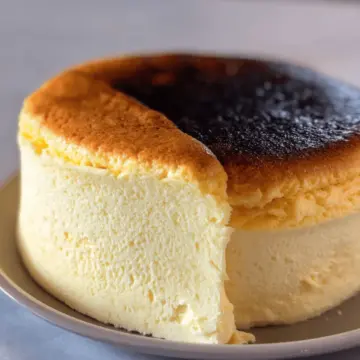
What sets the best home-baked Japanese cheesecake apart from traditional cheesecakes is its light, fluffy texture. Thanks to whipping egg whites to stiff peaks, this cheesecake boasts a soufflé-like consistency that feels ethereal on your palate. Imagine cutting into a cake that jiggles joyfully, as if it were inviting you to take a bite! This featherlight dessert is an excellent choice for those looking to impress guests or simply enjoy a lighter treat after a meal.
As you dive into the recipe, you'll find that the combination of cream cheese, sugar, and delicate folding techniques creates a harmonious balance of flavors. With each slice, you'll experience that perfect melt-in-your-mouth goodness that defines a classic Japanese cheesecake. Ready to dive into the world of this beloved dessert? Let’s get started with the foolproof recipe so you can master this delightful dish.
Ingredients for the Best Home-Baked Japanese Cheesecake
Essential ingredients for the perfect texture
Creating the best home-baked Japanese cheesecake recipe hinges on a few key ingredients that deliver that light, airy texture we crave. The star of the show is undoubtedly the egg whites, which must be whipped to stiff peaks. This process introduces air, giving the cake its signature fluffiness. Pair that with cream cheese and butter for a rich, creamy foundation, followed by milk and sugar to enhance the flavor. Don't overlook the cornstarch and flour, which help maintain that wonderful structure.
Optional flavor enhancements
While the classic version is truly delightful, exploring optional flavor enhancements can level up your cake! Consider adding vanilla extract for a warm, aromatic note or a splash of lemon juice for a refreshing twist. You could also experiment with matcha powder, a favorite in Japanese cuisine, to add a subtle earthy flavor. Lastly, garnishing with fresh strawberries or a drizzle of honey can make your cheesecake not only delicious but also visually appealing. Embrace these elements, and you'll be well on your way to mastering this delightful dessert!
Step-by-step Preparation of Japanese Cheesecake
Making the best home-baked Japanese cheesecake may sound daunting, but with a little guidance and patience, you’ll find it’s a delightful process! Here's how to prepare this light and airy treat.
Prepping your baking workspace
Before jumping into the fun, let’s organize your space. Clear off your counter, gather all your ingredients (egg whites, cream cheese, etc.), and get your kitchen tools ready—mixing bowls, a whisk or mixer, measuring cups, and baking pans. A clean and organized workspace not only makes the cooking process smoother but also more enjoyable.
Separating the eggs
Start by using fresh eggs. Gently crack each egg, holding it over two bowls. One should catch the egg whites while the other holds the yolks. This separation is crucial, as we’ll whip the egg whites later to create that delightful fluffiness! It’s best to allow the eggs to sit at room temperature for about 30 minutes for optimal whipping.
Preparing the cake batter
In a saucepan over low heat, combine the butter, cream cheese, and ¼ cup of sugar. Stir until all components melt and blend into a smooth mixture. Once melted, remove it from heat and softly fold in the egg yolks, followed by the cornstarch and flour until smooth. Finally, mix in the milk and any optional flavorings, like vanilla extract, that tickle your fancy.
Whipping the meringue
Here’s where the magic happens! Using a clean mixing bowl, beat the egg whites with cream of tartar until they form stiff peaks. This step adds air into the mixture, ensuring your cheesecake has that classic cotton-like texture. It might take some time, but trust me, it's worth the effort.
Combining the mixtures
After your meringue is ready, add about a third of it to your batter and gently fold it in. Repeat this process until everything is well combined, being careful not to overmix. The goal is to maintain the airiness from the whipped egg whites.
Preparing the baking pan
While you prepare to bake, preheat your oven to 330°F (165°C) and place a larger pan filled with water (this is the bain-marie method) at the bottom. For the cheesecake, you can use either one 8-inch or two 6-inch round pans. Make sure to line the bottom and sides with parchment paper—yes, this helps with the eventual smooth release.
Baking process with bain-marie method
Pour your batter into the prepared pan(s) and bake in the preheated oven for 25 minutes. Keep an eye on it; if the cheesecake rises beautifully, crack the oven door open slightly for 10 seconds, then lower the temperature to between 245°F and 265°F for another 45 minutes. This gentle heat is key to avoiding cracks!
Cooling and flipping the cake
After baking, let the cheesecake sit in the oven for about 10 minutes to gradually cool down. To flip it, place a plate on top of the pan and turn it upside down carefully. Once removed, peel off the parchment paper and replace it if necessary. Finally, admire your creation; the jiggly, fluffiness is sure to impress!
Letting it cool completely will allow the flavors to settle, so adjust your patience; it’s tempting, yet worth it. Serve this masterpiece warm or cold, and enjoy every bite of your homemade Japanese cheesecake!
Helpful links to check out: for a clearer understanding of meringue preparation, visit Serious Eats; to explore more about baking techniques, check out King Arthur Baking.
Variations on Japanese Cheesecake
Japanese cheesecake is delicious just as it is, but have you ever thought about adding a twist? Here are two delightful variations that will elevate your dessert game.
Matcha-Flavored Japanese Cheesecake
Incorporate the earthy bitterness of matcha for a unique flavor profile. Simply mix in a couple of tablespoons of high-quality matcha powder into your cake batter. This not only adds a vibrant green hue but also a delightful taste that pairs beautifully with the light fluffiness of the cheesecake. Serve it with a dusting of matcha on top for an elegant finish!
Fruit-Infused Japanese Cheesecake
Add a burst of freshness with seasonal fruits! Mash or puree strawberries, blueberries, or mangoes and mix them into the batter for an extra layer of flavor. Alternatively, you can top your cheesecake with fresh fruit or a homemade fruit compote. This is a great way to enjoy a touch of sweetness while still experiencing the cloud-like texture you love from the best home-baked Japanese cheesecake recipe.
Creating variations on this classic dish not only showcases your creativity but also allows you to cater to different tastes. Whether for a special occasion or just because, these twists are sure to impress!
Cooking Tips and Notes for Japanese Cheesecake
Avoiding Common Mistakes
When making the best home-baked Japanese cheesecake, be sure to avoid over-beating your egg whites; this can lead to a dry and dense cake. Also, pay attention when folding the batter—gentle motions are key. Over-mixing may deflate the air you've so carefully whipped into your egg whites, resulting in a flat cheesecake. Always remember to use room temperature cream cheese for a smoother mixture and to prevent lumps.
Ensuring Your Bake Rises Perfectly
For that perfectly risen, fluffy texture, the temperature of your oven is crucial. Preheat to 330°F and ensure that the water bath is set up correctly; this maintains moisture and prevents cracking. If your cake isn’t rising after 25 minutes, consider bumping the temperature up by 10 degrees. Lastly, allow it to cool in the oven; this gradual transition helps to stabilize the structure. Don’t rush the cooling process—patience truly pays off!
For more insights into achieving that spectacular texture, check out Serious Eats, where they dive deep into baking science.
Serving Suggestions for Japanese Cheesecake
Presentation Ideas
When showcasing the best home-baked Japanese cheesecake, let simplicity shine. Place the cheesecake on a beautifully patterned plate or a rustic wooden board for a chic contrast. You can also dust the top with powdered sugar for a touch of elegance. To amplify the visual appeal, consider adding fresh fruits like strawberries or kiwi slices around the cake.
Complementary Toppings and Pairings
Delight your taste buds by pairing your cheesecake with a variety of toppings. Here are some suggestions:
- Drizzle honey or maple syrup over a slice for added sweetness.
- Sprinkle matcha powder for a unique flavor twist and vibrant color.
- Serve with a side of whipped cream or a dollop of crème fraîche for creaminess.
- Experiment with fruits like blueberries, raspberries, or mango slices to balance the richness of the cake.
Feel free to explore and combine these ideas for a delightful dessert experience!
Time Breakdown for Preparing Japanese Cheesecake
Preparation Time
You’ll need about 20 minutes to gather your ingredients and mix the batter for the best home-baked Japanese cheesecake recipe. This is a great time to get your kitchen cozy and set the mood.
Cooking Time
Baking is where the magic happens! Plan for approximately 70 minutes in the oven, including adjustments to temperature and resting time.
Total Time
In total, you’ll be investing 1 hour and 30 minutes to create this delightful dessert. Just think of the delicious outcome waiting for you at the end!
For more tips on creating the most amazing textures and flavors, check out this Japanese Cheesecake guide that breaks down baking techniques!
Nutritional Facts for Japanese Cheesecake
Estimated calories per serving
Each slice of this heavenly Japanese cheesecake contains approximately 220-250 calories, making it a lighter alternative compared to traditional cheesecakes. Enjoying a slice will satisfy your sweet tooth without overwhelming your calorie count!
Key nutrients
This delightful dessert is not just about taste; it's also packed with essential nutrients:
- Protein: Contributes to muscle repair and growth.
- Calcium: Supports bone health, thanks to the cream cheese and milk.
- Healthy fats: Derived from butter, providing energy and supporting brain function.
Indulge in the best home-baked Japanese cheesecake recipe while keeping your nutritional goals in mind! For more information on cheesecake nutrition, check out resources like the USDA FoodData Central for detailed insights.
FAQs about Japanese Cheesecake
How can I tell when my cheesecake is done?
Determining the doneness of your cheesecake can be tricky! The best hint is the jiggle test: gently shake the pan, and the center should jiggle slightly but not be liquidy. A toothpick inserted into the edges should come out clean, while it's okay if it has a bit of batter on it from the center. Remember, this is a delicate cake; over-baking can lead to dryness.
Can I make this cheesecake ahead of time?
Absolutely! This best home-baked Japanese cheesecake recipe is perfect for prepping ahead. You can bake it a day in advance and chill it in the fridge overnight, which enhances its flavor and texture. Just be sure to let it come to room temperature before serving for the best experience!
How should I store leftover cheesecake?
If you find yourself with leftovers (which can be rare!), store them in an airtight container in the fridge for up to three days. For longer storage, you can freeze slices wrapped tightly in plastic wrap and then in foil. When you’re ready to indulge again, simply let it thaw in the fridge overnight. Enjoy every delightful bite!
For more tips on storing your desserts, check out FoodSafety.gov for optimal food storage guidelines.
Conclusion on Making Japanese Cheesecake
Now that you've mastered the best home-baked Japanese cheesecake recipe, it's time to savor the results! Remember, patience is key as you allow the cake to cool gradually. The reward? A delightfully fluffy treat that's perfect for any gathering. Enjoy every bite and share your experiences!
The Best Home-Baked Japanese Cheesecake Recipe by Kat Lieu
Equipment
- Mixer
- Pot
- oven
- baking pan
- parchment paper
- spatula
Ingredients
Egg White Meringue (Stiff Peaks)
- 5 pieces egg whites
- ¼ teaspoon cream of tartar (or vinegar or lemon juice)
- ¼ cup fine sugar (Not Confectioner sugar)
Cake Batter
- 5 pieces egg yolks
- 8 oz cream cheese (1 bar)
- ¼ cup butter
- ½ cup milk (125ml)
- ¼ cup fine sugar
- 2 tablespoon corn starch (15g), magic ingredient
- ¼ cup flour (use rice flour or Mochiko for gluten-free)
- Optional toppings strawberries, confectioner sugar, fruits of your choice, honey, matcha powder, etc...
Instructions
Instructions
- Separate 5 beautiful eggs. Place the egg yolks in a bowl, and the egg whites in a mixer bowl.
- Place the butter, cream cheese and ¼ cup of fine sugar into a pot over low-heat. Allow the ingredients to melt, and mix together into a beautifully smooth batter mixture.
- Remove the pot from heat, and add the egg yolks into the batter mixture. Mix well, but gently.
- Add the cornstarch and flour. Once again, mix well. Clumps should disappear.
- Add milk and optionally vanilla extract or other flavors of your choice.
- Mix well. The batter should be smooth and liquid-y. You won’t have to strain this mixture.
- Set aside the batter as you beat the egg whites into stiff peaks.
- Pre-heat oven to 330F. Prepare a bain-marie by putting water in a deep rectangular baking pan or dish. Place into the oven.
- Prepare baking pans— with these ingredients, you can bake one 8-inch cake or two 6-inch cakes. Line the bottoms of the baking pans with circular parchment paper, and the inside sides with rectangular strips of parchment paper.
- Once you achieve stiff peaks, place some beaten egg white into the batter and mix together.
- Repeat the above step two more times.
- Pour the batter into the rest of the egg whites and mix together using folding techniques. Avoid over-mixing or under-mixing.
- Pour the well-incorporated, but not over-mixed batter into the baking pan(s).
- Bake bain-marie style for 25 minutes at 330F. Adjust the temperature as needed.
- After 25 minutes, if the cake has not risen, keep it at the same temperature and give it more time to rise.
- Once it rises, crack open the oven door slightly and keep it open for 10 seconds. Lower the oven temperature to about 245-265F and bake for an additional 45 minutes.
- Allow your cake to rest in the oven after baking for about 10 minutes.
- Remove from the oven using oven mitts as needed.
- Place a sheet of parchment paper over the cake. Place a plate over the cake and parchment paper. Flip the cake upside down.
- Remove the wet parchment paper from the cake, replace the bottom parchment paper of the cake.
- Place another plate on top of the cake and flip it again carefully.
- Serve while still warm, or chill in the fridge, though it won't be bouncy or fluffy after chilling.
Leave a Reply