
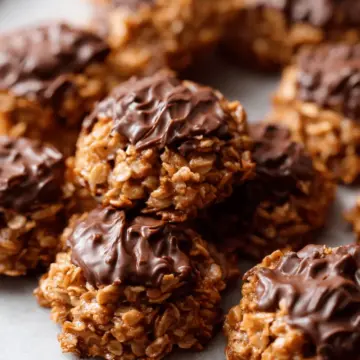
Introduction to Classic No-Bake Cookies
When life gets busy, whipping up a batch of freshly baked cookies might not be on your to-do list, but that's where classic no-bake cookies come in! Perfect for the busy young professional, these delicious treats can be made in no time and require minimal effort while still providing maximum satisfaction.
Why No-Bake Cookies are a Game Changer for Busy Young Professionals
Imagine coming home after a long day at work, and the urge for something sweet hits you. Instead of reaching for an overpriced snack or settling for cookies from the store, you can spend just 20 minutes preparing a homemade dessert that tastes incredibly satisfying.
No-bake cookies are a fantastic solution for those hectic weeknights or lazy weekends. Made with easily accessible ingredients like peanut butter, oats, and cocoa powder, they require no oven time, making them a quick, hassle-free baking option.
In a world where convenience is key, these cookies shine bright. Plus, you can customize them to suit your taste preferences or experiment with new flavors! Want to add a sprinkle of cinnamon or some chopped nuts? Go right ahead!
So gather your ingredients and get ready to enjoy the delightful simplicity and nostalgic flavor of classic no-bake cookies. Trust me, they will soon become your new go-to treat!

Ingredients for Classic No-Bake Cookies
When you’re in the mood for a sweet treat without turning on the oven, these classic no-bake cookies are an excellent choice! Let’s break down what you need to create these delicious bites.
Essential Ingredients You Need
To make these classic no-bake cookies, gather the following key ingredients:
- Butter: ½ cup, sliced into pieces to help it melt quicker.
- Granulated Sugar: 2 cups to add sweetness.
- Milk: ½ cup for that creamy texture.
- Unsweetened Cocoa Powder: ¼ cup to bring in the rich chocolate flavor.
- Creamy Peanut Butter: ½ cup, the heart of these cookies!
- Vanilla Extract: 1 teaspoon for an extra layer of flavor.
- Quick-Cooking Oats: 3 cups to give that chewy, cookie-like texture.
Optional Add-ins for Extra Flavor
Want to put your spin on these cookies? Here are some great optional add-ins:
- Chopped Nuts: Walnuts or pecans for added crunch.
- Chocolate Chips: For extra chocolatey goodness.
- Coconut Flakes: For a delightful tropical twist.
Feel free to be creative! Try different combinations or check out tips from baking experts for more ideas. With a base this versatile, you’ll never run out of tasty combinations to explore.
Step-by-Step Preparation of Classic No-Bake Cookies
If you’re looking for a quick and delicious treat, these classic no-bake cookies are the perfect solution. Let’s dive into the straightforward steps you’ll need to follow for a delightful dessert that requires zero baking!
Gather Your Ingredients
Before you start cooking, it’s essential to assemble all the ingredients. This helps you to stay organized and ensures that you have everything you need at hand. You’ll want to collect:
- ½ cup butter (sliced into pieces)
- 2 cups granulated sugar
- ½ cup milk
- ¼ cup unsweetened cocoa powder
- ½ cup creamy peanut butter
- 1 teaspoon pure vanilla extract
- 3 cups quick-cooking oats
Once you have these items, grab two large baking sheets and line them with parchment paper. You’re now ready for the fun part!
Melt and Combine the Base Mixture
Start by placing a large saucepan over medium heat. Add the butter, sugar, milk, and cocoa powder into the pan. Stir occasionally until the butter melts and all the ingredients are well combined. This mixture is your foundation.
Once it starts to bubble away, be sure to bring it to a rolling boil, then set a timer for 60 seconds. Timing is crucial here—boiling for just a minute ensures the cookies set perfectly!
Incorporate the Peanut Butter and Oats
After the mixture has boiled for a minute, remove it from the heat. Add in the creamy peanut butter and vanilla extract, stirring until fully merged. This is where the flavor really comes alive!
Next, it’s time to fold in the three cups of oats. Make sure every oat is well-coated with the gooey mixture. You’ll notice it thickening up, becoming a delicious blend that will soon turn into cookies.
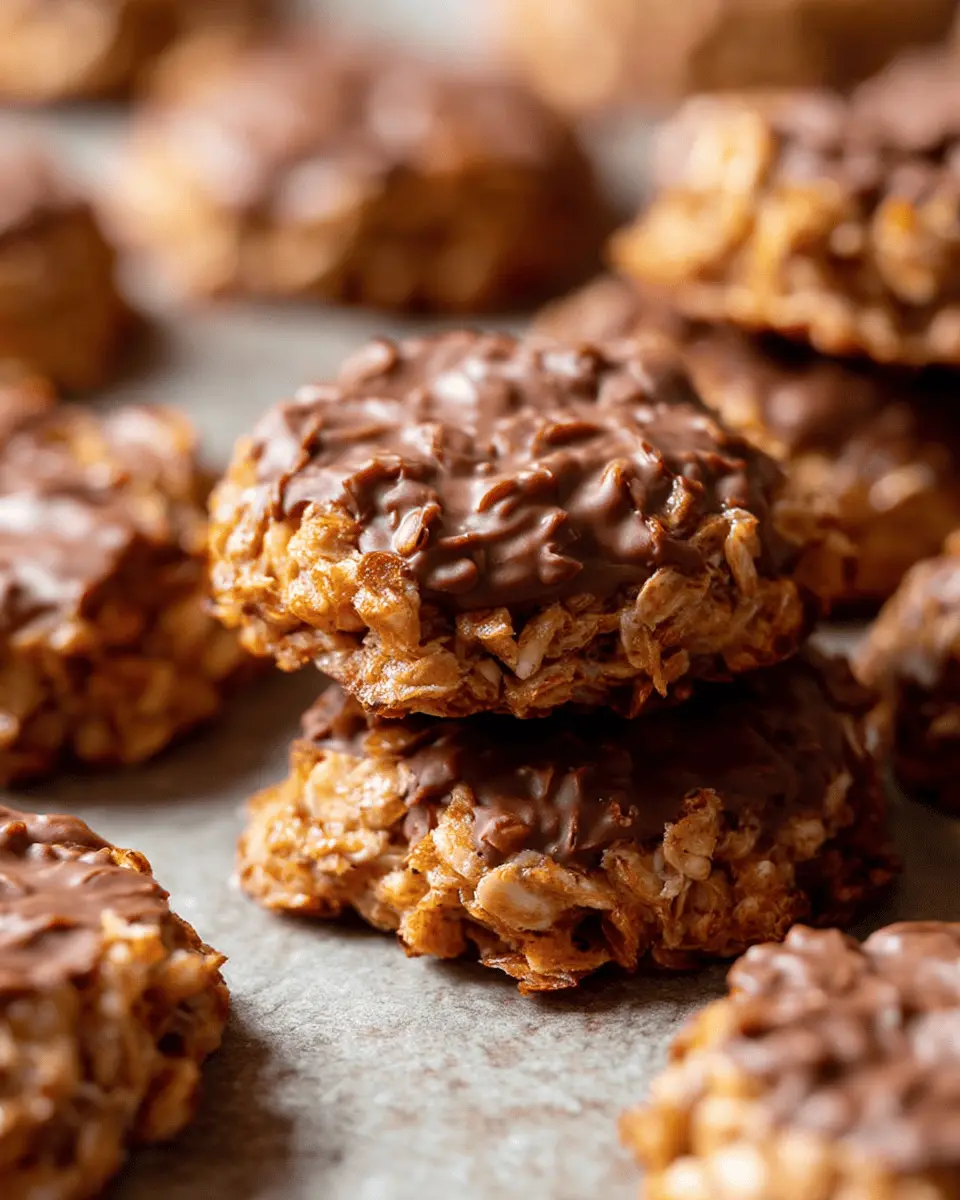
Shape the Cookies onto Baking Sheets
Now comes the fun part—shaping your cookies! Using a small cookie scoop or a simple tablespoon, drop spoonfuls of the mixture onto the prepared baking sheets. It’s okay if they aren’t perfectly round; they’re no-bake cookies, after all!
Feel free to experiment with the sizes. If you love bigger cookies, give it a generous scoop.
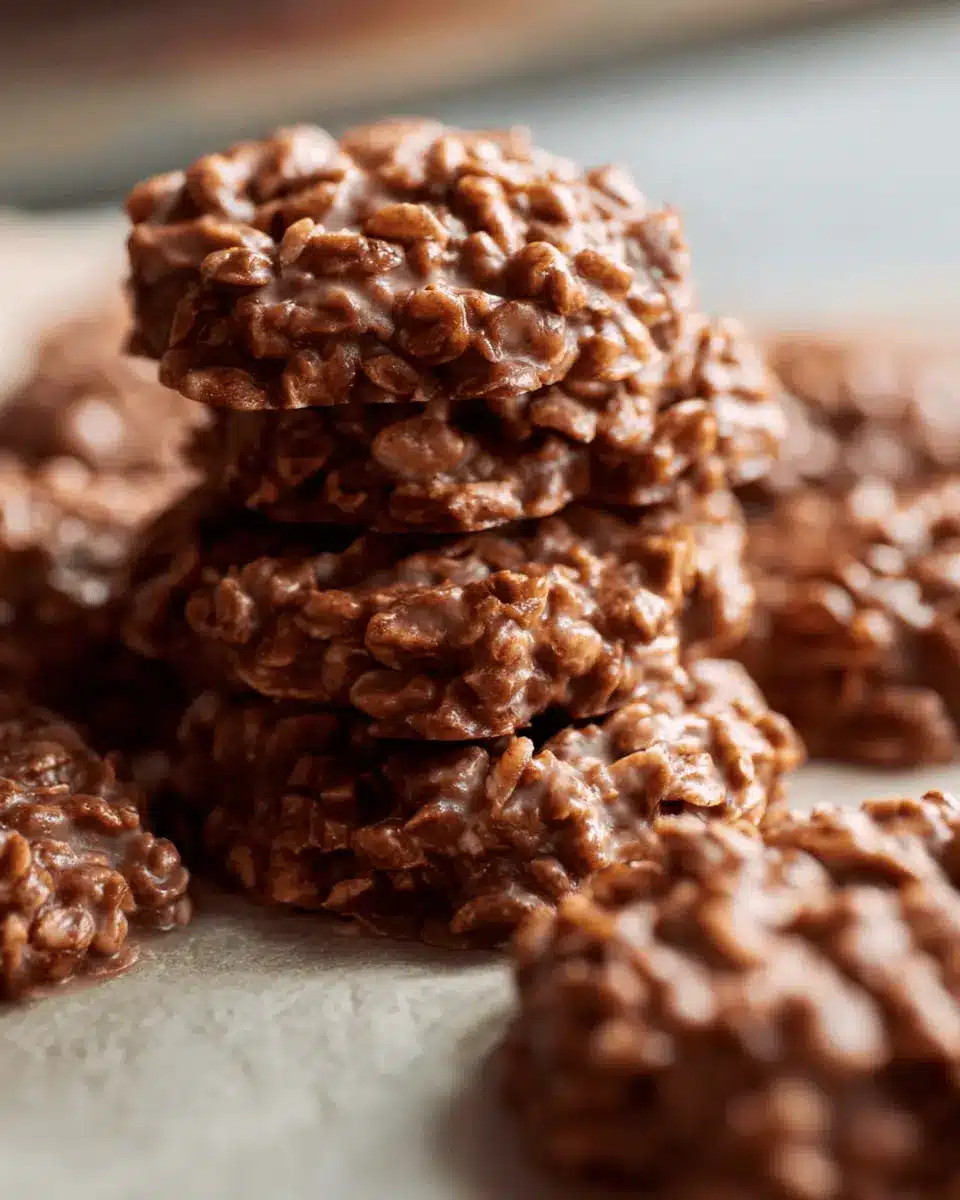
Allow to Cool and Set
It’s important to let your cookies cool undisturbed. Allow them to set for about 20 to 30 minutes. During this time, they’ll firm up into delightful treats that are ready to be enjoyed.
If you find yourself impatient, don’t worry—these classic no-bake cookies are worth the wait! Once cooled, you can store them in an airtight container for up to a week.
With just a few simple steps, you’ve created a batch of mouth-watering cookies that are sure to impress friends and family. Now, who’s ready for dessert?
Variations on Classic No-Bake Cookies
No-bake cookies offer endless possibilities for creativity. Here are two delightful variations to try!
Peanut Butter Chocolate Chunk Variation
For a twist on the classic no-bake cookies, consider adding chunks of dark chocolate along with extra creamy peanut butter. Simply fold in the chocolate towards the end for a rich, smooth texture. Not only do they taste phenomenal, but you'll also get the added health benefits of dark chocolate, which is loaded with antioxidants (check out this study by Healthline for more details).
Nut-Free and Vegan Options
If you're looking to enjoy classic no-bake cookies without nuts or animal products, simply swap out the peanut butter for an equal amount of sunflower seed butter. Use plant-based milk instead of dairy, and you’ll have a delicious, nut-free vegan treat that everyone can enjoy! Plus, these cookies are just as easy to whip up, making them perfect for gatherings and last-minute cravings.
Embrace these variations to elevate your no-bake cookies to a new level!
Cooking Tips and Notes for Classic No-Bake Cookies
Common Mistakes to Avoid
When making classic no-bake cookies, ensure you don’t skip the crucial step of letting the mixture boil for exactly 60 seconds. This helps the cookies set properly. Also, avoid overmixing after adding the oats; just mix until well combined to prevent them from becoming too dense.
How to Achieve the Perfect Texture
To get a delightful chewy texture, use quick-cooking oats. If you're using old-fashioned oats, pulse them in a food processor a few times to break them down. This little trick can make all the difference in achieving that soft, melt-in-your-mouth experience. Check out more tips on no-bake cookies from Serious Eats.
With these tips in hand, you’re ready to create the ultimate classic no-bake cookies! Enjoy your baking adventure!
Serving Suggestions for Classic No-Bake Cookies
Pairing Ideas for a Delicious Treat
Classic no-bake cookies shine even brighter when paired with other delightful snacks. Consider serving them alongside a tall glass of cold milk or a creamy alternative, like almond or oat milk. They also complement the nutty flavors of a homemade granola or the fresh sweetness of seasonal fruit, such as strawberries or bananas. Want a cozy vibe? A steaming cup of herbal tea or coffee adds the perfect touch.
Creative Ways to Serve
Elevate your presentation by stacking these cookies on a pretty platter, garnished with a sprinkle of cocoa powder or crushed nuts. For a festive flair, drizzle melted dark chocolate over the top. You might even want to sandwich a couple of the classic no-bake cookies between scoops of vanilla ice cream to create a scrumptious dessert sandwich! These adaptations not only look impressive but also elevate your treat from simple to sensational.
If you want some more insights into the nutritional benefits of oats or the versatility of peanut butter, check out this article and this informative piece to enhance your baking knowledge!
Time Breakdown for Classic No-Bake Cookies
When it comes to whipping up a batch of classic no-bake cookies, you'll love how quickly they come together! Here’s a detailed breakdown of the time commitment.
Preparation Time
In just 20 minutes, you can gather, measure, and mix your ingredients to create this delightful treat. It’s a great option if you’re short on time but craving something sweet!
Cooling Time
After dropping your cookie mixtures onto the baking sheets, allow them to cool for about 20 minutes. This is the perfect opportunity to grab a book or catch up on your favorite show while the cookies set.
Total Time
All in all, from start to finish, you’re looking at a breezy 45 minutes to enjoy these delicious treats. It’s a fantastic dessert option for busy evenings or spontaneous gatherings.
By following these quick time guidelines, you can effortlessly incorporate classic no-bake cookies into your weekly routine! For more tips on making the most of your time in the kitchen, check out this helpful guide on efficient cooking strategies.
Nutritional Facts for Classic No-Bake Cookies
Calories per Cookie
When it comes to indulging in classic no-bake cookies, knowing the calorie count can help you enjoy them mindfully. Each cookie contains approximately 130 calories. While they’re a sweet treat, it’s all about moderation!
Protein and Other Nutrients
These delightful cookies pack a bit of a nutritional punch! With ingredients like peanut butter and oats, they provide about 3 grams of protein per cookie, along with essential nutrients like fiber and healthy fats. So, you can feel good about treating yourself to a few of these delicious bites.
For a deeper dive into nutritional information, the USDA FoodData Central is a fantastic source to explore!
FAQs About Classic No-Bake Cookies
Can I Use Alternative Sweeteners?
Absolutely! If you're looking to cut down on sugar, there are several alternative sweeteners you can use, such as honey, maple syrup, or even Stevia. Keep in mind that alternative sweeteners may alter the taste and texture slightly, so you might need to experiment to find the right balance. For further guidance, check out this sweetener substitution guide.
How Long Do They Last?
These classic no-bake cookies can last up to a week when stored properly. Be sure to keep them in an airtight container to maintain their freshness.
Tips for Storing Leftovers
For the best storage experience, separate layers of cookies with parchment paper and keep them in a cool place, like your kitchen counter or pantry. If you want them to last even longer, consider freezing them! Place cooled cookies in a freezer bag, and they can be enjoyed for up to three months. Be sure to let them thaw to room temperature before serving for the best flavor and texture!
Conclusion on Classic No-Bake Cookies
In wrapping up, classic no-bake cookies are not only a delightful treat but also a quick and easy option for dessert lovers. With minimal ingredients and steps, you can enjoy a satisfying, chocolatey snack in no time. Remember to store them properly so you can savor every last bite! For more tips on cookie storage and variations, check out resources like the Food Network and Serious Eats. Happy baking!
Classic No-Bake Cookies: Easy and Indulgent Treats for Everyone
Equipment
- large saucepan
- cookie scoop
- baking sheets
- parchment paper
Ingredients
- ½ cup butter sliced into pieces
- 2 cups granulated sugar
- ½ cup milk preferably whole milk
- ¼ cup unsweetened cocoa powder
- ½ cup creamy peanut butter
- 1 teaspoon pure vanilla extract
- 3 cups quick-cooking oats
Instructions
- Before getting started, make sure to gather all of your ingredients and measure everything out. Line two large baking sheets with parchment paper and set aside.
- Combine the butter, sugar, milk, and unsweetened cocoa powder in a large saucepan and heat over medium heat, making sure to stir often until the butter is melted and everything is well combined. Bring the mixture to a rolling boil and allow to boil for 60 seconds, stirring occasionally.
- Remove from the heat, and stir in the peanut butter and vanilla extract until fully combined. Stir in the oats and mix until all of the oats are coated with the mixture and everything is well combined.
- Drop spoonfuls of the mixture onto the prepared baking sheets and allow to cool for 20 to 30 minutes, serve, and enjoy!
Leave a Reply