
Introduction to Homemade Banana Pudding
When it comes to comfort food, homemade banana pudding truly captures the essence of nostalgia and joy. This classic treat brings back sweet memories of family gatherings, backyard barbecues, and holiday feasts. The layers of creamy vanilla pudding, fresh bananas, and crunchy vanilla wafers create a delightful contrast that mesmerizes the taste buds.
Why is homemade banana pudding such a beloved dessert? For one, it’s incredibly versatile. You can serve it in a bowl, individual cups, or even parfait-style, making it perfect for any occasion. Plus, it’s made with simple, accessible ingredients that most kitchens have on hand, and there’s something undeniably satisfying about preparing it from scratch.
A study published by the National Dairy Council emphasizes the nostalgic power of foods like banana pudding, stating that flavors associated with childhood often bring about feelings of happiness and warmth. Isn't it amazing how food can connect us across generations?
If you’ve never made homemade banana pudding before, today’s your chance to impress family and friends with a dish rooted in tradition and love. Let’s dive into the recipe and create some sweet memories together!
Ingredients for Homemade Banana Pudding
Essential ingredients for the perfect pudding
To create a truly delightful homemade banana pudding, you need just a few essential ingredients:
- ⅔ cup white sugar - Sweetness is key, but moderation is crucial!
- ⅓ cup all-purpose flour - For that silky smooth texture.
- ¼ teaspoon salt - It balances the sweetness.
- 3 large eggs, beaten - These help thicken the pudding while adding richness.
- 2 cups milk - Whole or 2% for creaminess (almond milk is a great dairy-free substitution!).
- 2 tablespoons butter, softened - Adds a nice finish and flavor.
- ½ teaspoon vanilla extract - A must for depth!
- 2 bananas, peeled and sliced - Fresh bananas create the perfect fruity layer.
- ½ (12 ounce) package vanilla wafer cookies - These provide a delightful crunch.
Why quality matters in your ingredients
Using high-quality ingredients makes a noticeable difference in flavor and texture. For instance, opt for fresh, ripe bananas for that naturally sweet flavor and creamy texture. When selecting vanilla extract, go for pure vanilla instead of imitation, as it significantly enhances the overall taste of your homemade banana pudding.
Remember, cooking is all about love and care, so use the best ingredients you can find. You’ll not only impress your guests but also make memories with this classic dessert! For more inspiration on great ingredients, check out Serious Eats for tips on culinary success.
Preparing Homemade Banana Pudding
If you're craving a comforting dessert that evokes a sense of nostalgia, homemade banana pudding is the answer! This creamy, dreamy dessert is surprisingly simple to make and can impress anyone who takes a bite. Let’s walk through the steps together!
Gather Your Ingredients
First things first, let’s collect everything you need to whip up this delightful pudding. Here’s your shopping list:
- ⅔ cup white sugar
- ⅓ cup all-purpose flour
- ¼ teaspoon salt
- 3 large eggs, beaten
- 2 cups milk
- 2 tablespoons butter, softened
- ½ teaspoon vanilla extract
- 2 bananas, peeled and sliced
- ½ (12 ounce) package vanilla wafer cookies
Having your ingredients ready will make the process smoother and more enjoyable. Plus, there’s something satisfying about organizing your kitchen before you cook!
Combine Sugar, Flour, and Salt
In a medium saucepan, combine the sugar, flour, and salt. This mixture sets the foundation for your homemade banana pudding. Make sure to whisk them together well; you want a uniform mix without any clumps. This step is crucial because it ensures that your pudding will have the right texture—no one likes a lumpy dessert!
Whisk in Eggs and Milk
Now, it’s time to add the key players: the eggs and milk. Whisk these into your dry mixture until well-combined. As you do this, remember to take your time—patience pays off here! Cook this mixture over low heat, stirring constantly. You'll notice it thickens nicely, which should take about 10-15 minutes. Cooking tip: If you see the mix starting to bubble, turn down that heat!
Cook Until Thickened
Keep stirring away! You want to bring the mixture to the point where it coats the back of a spoon. This creamy consistency is what you’re after. Once thickened, remove the saucepan from heat (you did it!). Continue stirring for another minute to cool slightly before moving to the next step.
Incorporate Butter and Vanilla
Now, for some extra flavor! Stir in the butter and vanilla extract until they meld seamlessly into your pudding. The rich aroma will fill your kitchen, and at this point, you might find it hard not to taste-test (totally understandable!).
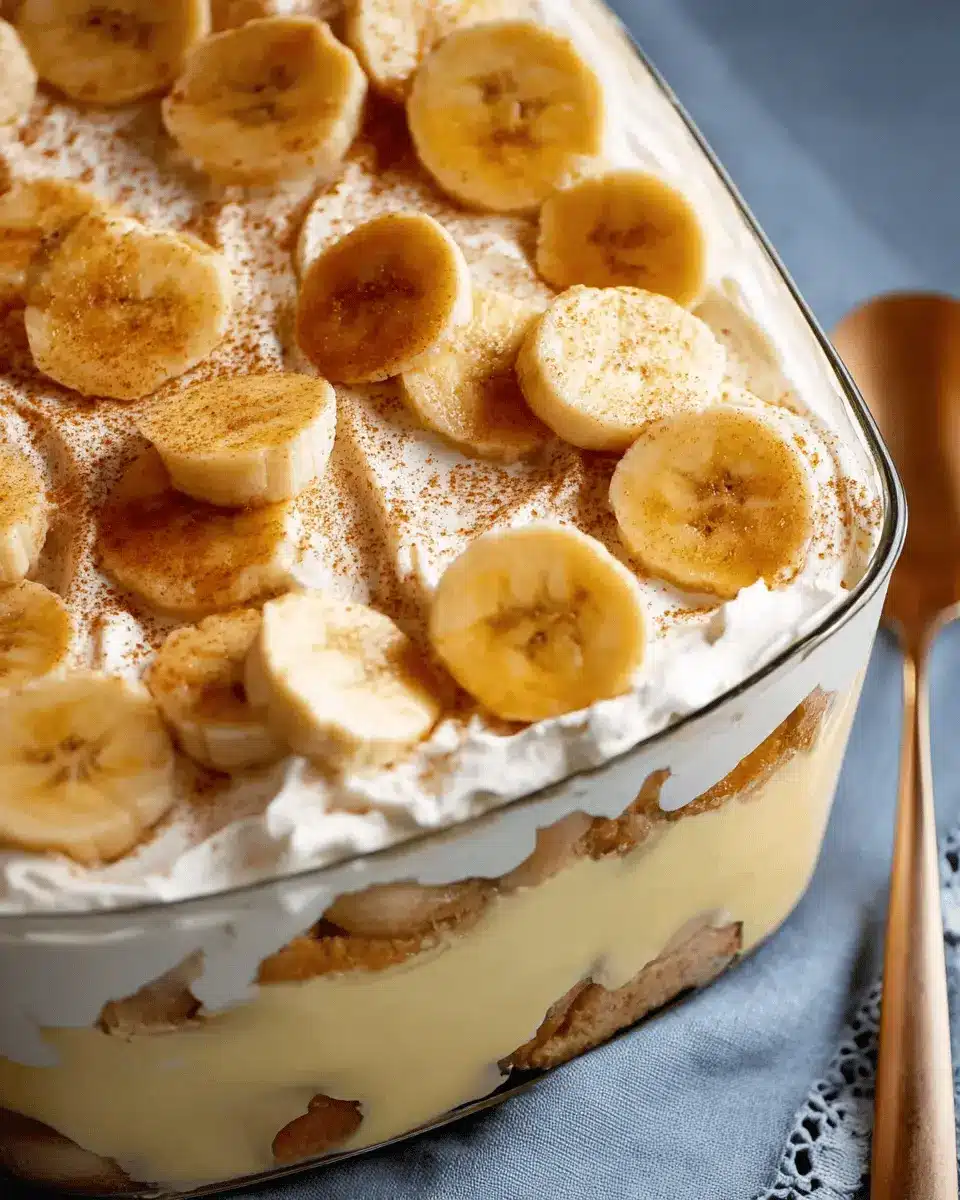
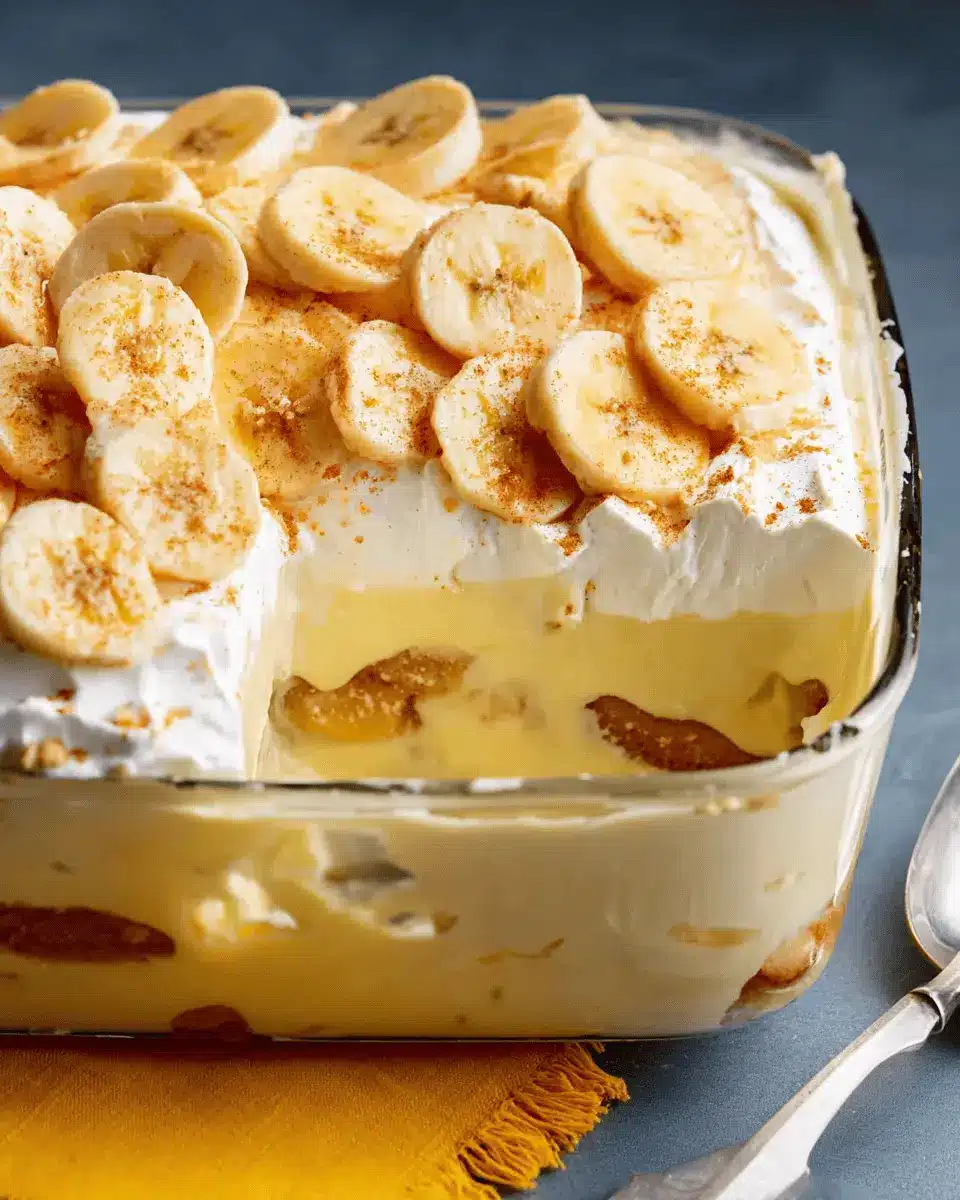
Layer with Bananas and Vanilla Wafers
Grab a large serving dish and start layering your pudding, sliced bananas, and vanilla wafers. Begin with a layer of pudding, then a layer of bananas and wafers. Repeat until you’ve used everything. This not only looks beautiful but creates that wonderful combination of textures you’ll love!
Chill Before Serving
This step is important: allow your homemade banana pudding to chill in the refrigerator for at least one hour. This time lets all the flavors meld beautifully. Trust me, the wait is worth it! When it's finally time to serve, expect smiles all around.
Now that you know how easy it is to prepare homemade banana pudding, you’re all set to create this classic treat that brings smiles with every spoonful! Enjoy!
Variations on Homemade Banana Pudding
Chocolate Banana Pudding Twist
If you're a chocolate lover, adding cocoa powder or chocolate pudding mix to your homemade banana pudding can elevate it to new heights! Simply replace one-third of the flour with cocoa or mix in an instant chocolate pudding while preparing your base. Layering the chocolate pudding with sliced bananas and vanilla wafers will create a delightful contrast that your taste buds will adore. Why not serve it with some chocolate shavings on top?
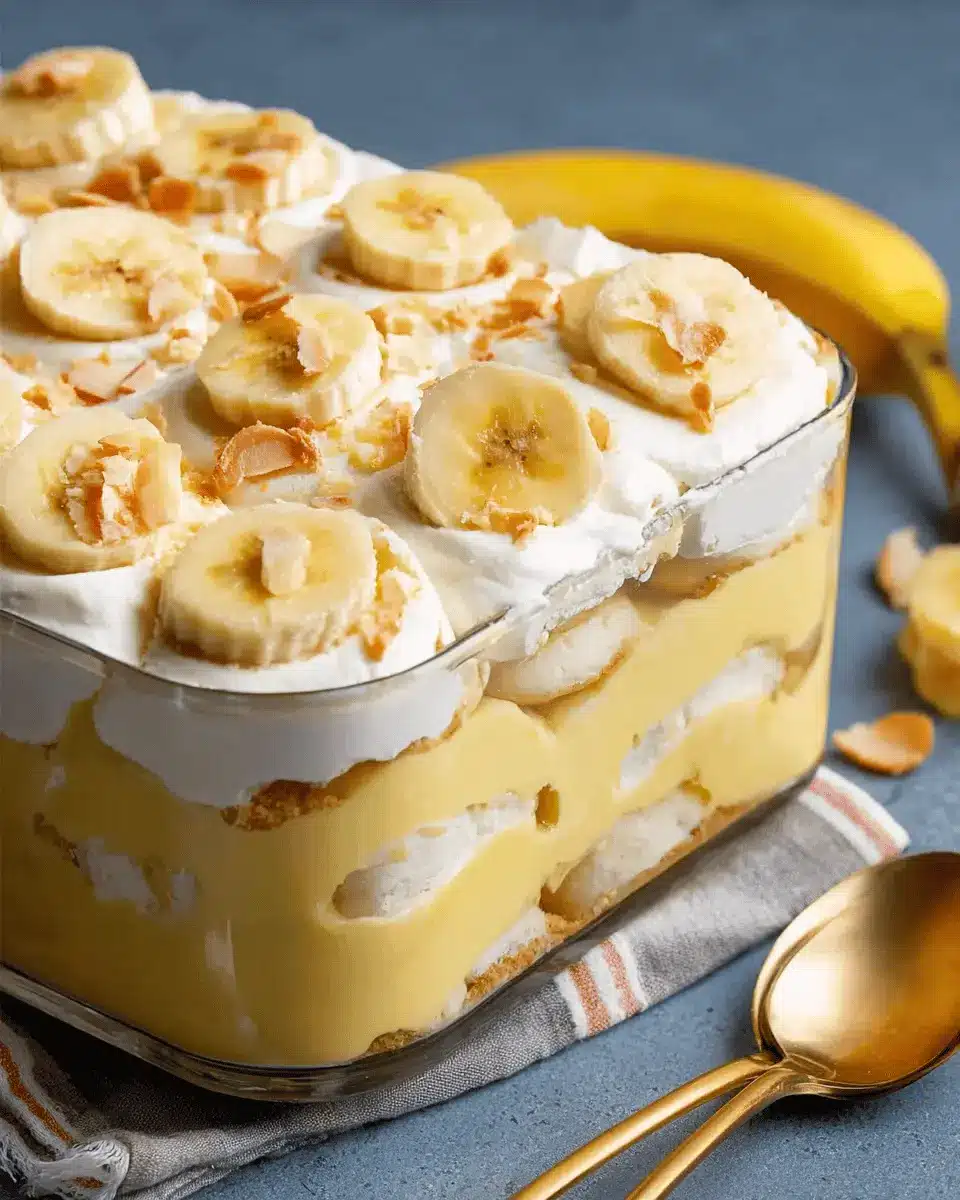
Adding Nuts for a Crunchy Texture
For an added crunch, consider mixing in your favorite nuts! Chopped pecans or walnuts can provide a delightful texture that complements the creamy layers of homemade banana pudding. Just toss them in with the bananas and wafers for a nutty surprise in each spoonful. Not only do they add flavor, but they also contribute a nice nutritional boost— nuts are a great source of healthy fats and protein.
These simple variations can make your banana pudding experience even more enjoyable; how will you customize yours?
Cooking Tips and Notes for Homemade Banana Pudding
Common Pitfalls to Avoid
When making homemade banana pudding, avoid rushing the cooking process. If the heat is too high, your custard can scorch or become lumpy. Additionally, be cautious not to overcrowd your layers with bananas and wafers; a balanced ratio enhances flavor and texture.
Importance of Patience in the Cooking Process
Patience is key! The combination of sugar, flour, eggs, and milk requires gentle stirring over low heat. This slow cooking not only thickens your pudding but also develops rich flavors. Resist the temptation to skip chilling—it allows the flavors to meld beautifully, creating that perfect creamy texture your family will love.
For more cooking tips, check out resources like the Food Network.
Serving Suggestions for Homemade Banana Pudding
Perfect Accompaniments for Your Pudding
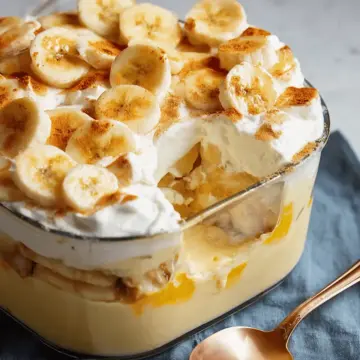
Pair your homemade banana pudding with a drizzle of caramel sauce or a sprinkle of cinnamon for an extra layer of flavor. Fresh berries, like strawberries or blueberries, not only add a pop of color but also balance the sweetness. Consider serving it alongside a scoop of vanilla ice cream or whipped cream for a delightful contrast in texture.
Creative Serving Ideas for Gatherings
When hosting, consider presenting your homemade banana pudding in individual jars for each guest—it's both charming and practical! You can also create a banana pudding parfait bar with toppings like crushed vanilla wafers, nuts, and coconut flakes, allowing guests to customize their desserts. If you’re feeling adventurous, layer the pudding with chocolate mousse for a rich twist that will wow your friends.
For more inspiration, check out these ideas on Delish.com for creative dessert serving techniques!
Time Breakdown for Homemade Banana Pudding
Creating your delicious homemade banana pudding is a breeze with this simple time guide. Here’s the breakdown:
Preparation Time
Start with just 10 minutes to gather and mix your ingredients. It’s the perfect time to enjoy some music or a quick chat with a friend!
Cooking Time
Invest about 20 minutes cooking over low heat. Stirring constantly is essential for achieving that creamy texture we all love.
Chilling Time
Allow your pudding to chill in the fridge for at least 1 hour. This step is vital for that perfect, cool treat.
Total Time
In just 1 hour and 30 minutes, you can whip up this delightful dessert!
Enjoy your homemade banana pudding with friends or family; it’s a dish that brings everyone together! If you’re curious about other dessert options, check out resources like BBC Good Food for more inspiration.
Nutritional Facts for Homemade Banana Pudding
When you indulge in homemade banana pudding, it's good to know what you're treating yourself to. Here’s a quick breakdown:
Calories
With approximately 580 calories per serving, this delightful dessert packs a satisfying punch while remaining a cherished comfort food.
Sugars
Each serving contains around 62 grams of sugar, mainly from the bananas and added sweeteners, providing that classic sweetness you crave.
Protein
You’ll get about 13 grams of protein from the eggs and milk, making this treat a bit more balanced while you enjoy its creamy goodness.
For more about the health benefits of bananas, check out resources like Healthline which underscores the nutritional power packed in this modest yet delicious fruit. You can also glance at USDA for a comprehensive chart on various ingredients used in this recipe.
FAQs about Homemade Banana Pudding
Can I make banana pudding ahead of time?
Absolutely! One of the best parts about homemade banana pudding is that it can be prepared in advance. In fact, it often tastes better the next day as the flavors meld together. Just follow the recipe, let it cool, and store it in the fridge until you're ready to serve. It’s perfect for gatherings or when you're craving a sweet treat without the last-minute rush!
What’s the best way to store leftover pudding?
To keep your leftover pudding fresh, transfer it to an airtight container and store it in the refrigerator. It’s best to cover the surface with plastic wrap to prevent a film from forming. While it’s delicious for a few days, be sure to eat it within 3 to 4 days for optimal taste and texture. Just remember to enjoy those layers of bananas and wafers each time!
Can I use other fruits in banana pudding?
Definitely! While classic homemade banana pudding features bananas, feel free to get creative. Try adding strawberries, peaches, or even blueberries for a fruity twist. Just remember that more moisture from different fruits may affect the consistency, so use them strategically. Experimenting is half the fun in the kitchen!
Conclusion on Homemade Banana Pudding
Creating homemade banana pudding is not just about satisfying your sweet tooth; it’s about crafting a dish that brings back cherished memories. This delightful dessert is a perfect way to bond with loved ones, offering a taste of nostalgia with every creamy spoonful. Enjoy making this dessert together, and savor the connections it nurtures.
Homemade Banana Pudding
Equipment
- Medium saucepan
- whisk
- Large serving dish
Ingredients
Pudding Base
- ⅔ cup white sugar
- ⅓ cup all-purpose flour
- ¼ teaspoon salt
- 3 large eggs, beaten
- 2 cups milk
- 2 tablespoons butter, softened
- ½ teaspoon vanilla extract
Toppings
- 2 bananas, peeled and sliced
- ½ (12 ounce) package vanilla wafer cookies
Instructions
Preparation
- Gather all ingredients.
- Combine sugar, flour, and salt together in a medium saucepan. Whisk in eggs and milk; cook mixture over low heat, stirring constantly (and patiently), until mixture has thickened enough to coat the back of a spoon, up to 15 minutes.
- Remove from heat and continue to stir until pudding has cooled slightly; whisk in butter and vanilla until incorporated and smooth.
- Spread pudding into a large serving dish; layer with sliced bananas and vanilla wafers.
- Chill at least 1 hour in the refrigerator before serving.

Leave a Reply